How to Season A Dutch Oven

The Dutch Oven Doctor

The Dutch Oven Doctor

I’m a cook, not a chemist

or so I thought……

Copyright © 2019 William Bruce Bonnett

Over the years I have been asked, “How do you get your Dutch oven pots so black and shiny?” The answer is simple – True Value High Temperature Semi-gloss Black Spray Paint… just kiddin’ folks, please don’t paint your pots.

But seriously,…understanding that black shiny finish on a cast iron pot, affectionately known as seasoning, is a study in kitchen chemistry.

KITCHEN CHEMISTRY

The seasoning on a cast iron pot is a chemical compound made of tightly bonded carbon atoms. These carbon atoms come from cooking oils, shortening and meat fats that were cooked in the pot. The oils and fats are chemically attracted to each other.  They stick to the oven’s surface and to each other.  This chemical attraction is called molecular adhesion. When the pot is heated to the smoke point or the oils or fats, the carbon compound is left on the surface through the process of heating.

A Cast Iron Pot Before Seasoning

Bare metal cast iron pot with no seasoning

Can something as simple as carbon protect a pot and provide that non-stick surface we all strive for? The answer is – yes. The heat shield that protects the N.A.S.A. space shuttle is made of carbon. Carbon fishing rods and golf clubs are well known for their strength and durability. The hardest substance known to man, diamonds, are made from it.

Imagine! Space age technology used around campfires centuries ago.

A well seasoned cast iron pot will last forever. It has an airtight slick surface that protects it from rusting. A well season pot can be as easy to clean as a wipe with a damp cloth. Your grandmother’s cast iron pots had non-stick surfaces years before DuPont tried to improve on it by coating pots with TEFLONTM. A principle ingredient in TEFLONTM is … you guessed it… carbon. I would say the jury is still out on how well DuPont accomplished that goal. After all, where are your TEFLONTM pots and pans you or your mother used in the 1960’s and 1970’s? In landfill I’m sure. I still cook in the Dutch oven my grandfather handed down to me 40 years ago.  One pot I cook in regularly is over 90 years old.  In my opinion, the most truly dependable long lasting cook surface is the cast iron cook surface….but I digress.

Dutch Oven Pot after Seasoing Process

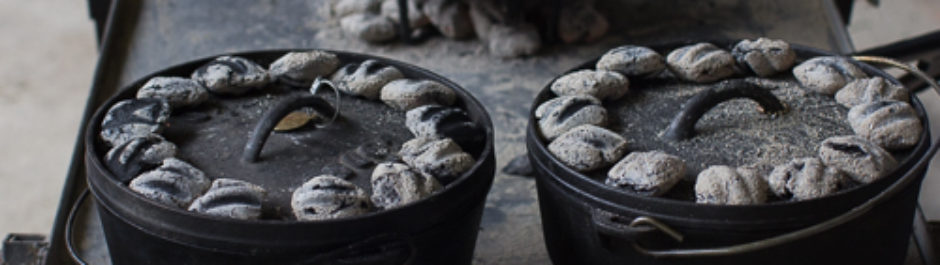
A Dutch Oven after the seasoning process is applied

Getting back to how to season your pot.

You are probably familiar with the various manufacturers’ seasoning recommendation. Those generally recommend coating the pot with vegetable shortening and heating it in a oven set at a moderate temperature.  The result is a brown waxy finish that peals off. I would like to share with you the seasoning method I use that will give that black shiny non-stick surface that adheres well to the pot.

I must first warn you that this is a very high temperature method that makes a lot of smoke. It will create dense clouds in your kitchen and will set off your smoke detectors. I use this method only on breezy days that I can leave the doors and windows open or do it outdoors in my enclosed gas grill. Care must be taken to avoid being burned because of the high temperature used.

This seasoning method was passed on to me from that Higher Authority – yep you got it – a sales clerk working in a Lodge Factory Store. I received the communication in a vision on a pilgrimage to that Mecca for cast iron enthusiasts at the factory store located in what is now Sevierville, Tennessee…but I digress.

Getting back to seasoning your pot.

If I start with a new unseasoned pot, I follow manufactures instruction for removing casting release and the light waxy substance that is used to protect the pot during shipping and storage. I then remove excess water with a cloth and thoroughly dry by warming the pot to between 100 and 120 degrees Fahrenheit. This is a temperature whereby I can handle the pot safely with a hot pad …BUT MUCH CARE IS TAKEN to make sure I didn’t get it hotter so I won’t burn myself when handling.

I lightly coat the surface with canola oil. Why canola oil? Canola oil has a fairly high temperature smoke point of about 400 degrees Fahrenheit while the smoke point of shortening or vegetable oil is around 350. The smoke point of corn oil is even lower and animal fats such as butter or lard lower still. The advantages of the higher temperature smoke point oils are they are thinner and have less hydrogen atoms (the kitchen chemistry lesson continues). You’ve probably heard the term “hydrogenated vegetable shortening” or “saturated fats” and have you ever wondered what the fats are saturated with? The answer is: HYDROGEN atoms.

The idea behind the seasoning process is to remove all the non-carbon components in the oil while leaving only carbon behind in such a manner that the carbon-carbon bond I mention earlier is formed. The non-carbon components are hydrogen and oxygen based compounds. During seasoning not all of the carbon stays on the pot. The majority of the carbon boils off the surface along with the oxygen and hydrogen, this is called “smoke” and carbon dioxide. But enough is left behind to do the job. When you start with an oil that has less of the non-carbon components, the higher the carbon density of the oil and the harder the finished carbon-carbon bond surface will become. That is why I use Canola oil.

With a dry dish towel – that my wife bought me special because I kept ruining all her other dish towels, but that’s another story – I wipe the excess oil so that there is a thin uniform coating on the entire pot and lid. I preheat the oven to 475 degrees. After the oven reaches temperature, I very very carefully place the pot and lid in the oven on separate racks and close the oven door. I then quickly run and open all the doors and windows to the house and turn on the exhaust fans. After 30 minutes, I turn off the oven and leave the pot in the oven until the oven, pot and lid are cool. When I remove it – it’s black. So black you would think I painted it with True Value High Temperature Semi-gloss Black Spray Paint…..but seriously folks,…..don’t paint your pots.

The Doctor

Posted in Cast Iron Care, Tips and Tools | Tagged | 5 Comments

Goat Cheese and Herb Biscuits

Look at all those flaky layers!

Who doesn’t love scratch-made flaky biscuits?  But making them and baking them… that’s a whole different story.  Scratch-made biscuits are a challenge to make without turning them into tough hockey pucks.

Add to that the challenge of temperature control when baking with charcoal in a camp Dutch oven where they can come out gooey and underdone or worse, burned.  I’ve been thinking about these two challenges because our friends Lesley Tennesen and Chuck Frost are hosting this year’s National Dutch Oven Gathering (NDOG) and they asked me to teach a class on baking perfect biscuits.

Golden Brown Biscuits_This year’s National Dutch Oven Gathering will be held in Hillsdale, Illinois at the Sunset Lakes RV Resort October 11-13, 2019.  If you are a Dutch oven expert or if you want to learn more about outdoor cooking, this is the event for you!  Registration is open now.  Let me know if you are going – I’d love to meet you.

In this recipe I will give detailed instructions regarding the process to make the biscuits tender and flaky as well as important steps for temperature control to insure the biscuits are baked and not burned.

We baked this recipe several times and here’s what we learned about successful biscuits.  #1:  Do NOT lift the lid.  If you want to turn the lid to avoid hot spots, do so carefully.  #2 Hang out with your oven during the final minutes of baking.  When you smell the lovely aroma of baked biscuits, you know you are close.  Let it bake a bit longer.  When you take off the lid, steam will waft out.  Look for golden brown tops.  If they are not golden brown, put the lid back on as quickly as possible.  #3 We wrapped our Dutch oven with aluminum flashing. This kept heat close to the oven and prevented the wind from taking the heat away from our very hot oven.  #4 Replace charcoal with fresh “tip” coals to insure the Dutch oven is as close to 425 as possible.  Dutch Oven Wrapped in Aluminum Flashing_

Quick side note regarding a super easy and helpful tech tool:  My wonder hubby and “charcoal dude” recommends Dutch Oven Helper App.  This application calculates the number of charcoal needed for different functions (simmer, bake, roast of fry) and sized of Dutch oven.  For this recipe we increased the number of charcoal on top to 23 but kept the bottom number at 10.

Dutch Oven Helper App

Thanks to Pinterest, I spotted this recipe for Rosemary Goat Cheese Biscuits and knew I had to give it a try.  I was intrigued by the idea of goat cheese in a biscuit and wondered about the flavor of these biscuits. Mmmm!  Remarkably, the goat cheese adds just a hint of tangy flavor and makes the biscuits so moist and tender.

Enjoy!

Leslie and Steve

Goat Cheese and Herb Biscuits
Print Recipe
Tall, flakey, tender... so yummy! These biscuits are perfect to serve with hot soup, warm scrambled eggs, or split with a slice of ham in the middle.
Servings Prep Time
12-14 biscuits 30 minutes
Cook Time
20 minutes
Servings Prep Time
12-14 biscuits 30 minutes
Cook Time
20 minutes
Ingredients
Servings: biscuits
Instructions
  1. Prepare a 12-inch camp Dutch oven by spraying it with oil or rubbing a pat of butter all over the bottom of the oven.
  2. In a large bowl, add flour, salt, pepper, baking powder, sugar, chives, rosemary, garlic powder, and onion powder. Using a large fork, whisk the ingredients together until herbs are distributed equally throughout the flour.
  3. Unwrap a whole (8 tablespoons) stick of butter half way down, leaving one half wrapped and the other unwrapped. Fold the wrap back to show markings for tablespoons. Make a mark showing the top 3 tablespoons. Using the largest holes of a box grater, quickly grate three tablespoons of butter into the flour and herb mixture. Carefully toss the grated butter into the flour mixture, taking care to coat each strip of butter and separating clumps. Try NOT to touch the butter with your fingers.
  4. Add crumbled goat cheese, tossing with fork and breaking up clumps into pea size pieces.
  5. Add heavy cream to flour/butter/cheese mixture. With as few strokes as possible (under 20), toss the flour into the cream using a rubber spatula, scraping the sides of the bowl. The goal is to just barely work the dough. It will be shaggy and a mess, but that is OK! Your biscuits will be tender thanks to this gentle step!
  6. Sprinkle a lot flour (approximately 1/8 cup) onto work area, then dump shaggy dough out. Place prepared Dutch oven, rolling pin, bench scrapper, and biscuit cutter within arms reach.
  7. Generously sprinkle flour over your hands, then gently push dough into a square that is about 8-9 inches on each side. The dough will be very sticky but don't worry. Add more flour to your hands or to the top of the square as needed, but as sparingly as possible.
  8. Gently roll the square out until it is about 16-inches or doubled in size. Add flour as needed but sparingly to keep rolling pin from sticking to dough. Use bench scrapper to make sure the bottom of the dough is not sticking to the work surface. The first roll out will be messy. Messy is good!
  9. Using a bench scrapper, fold one third of one side over and repeat for the other side, in the fashion of folding a business letter. Using your bench scrapper, turn the dough 45 degrees. Again, the dough will be shaggy and a mess.
  10. Gently roll out dough until it is about 1/2 inch thick. Repeat turning, folding (business letter) rolling out, and turning two more times. These folds create the layers in each biscuit. The dough should start to hold together.
  11. Fold business letter one more time, and roll out to about 3/4 inch thickness. Using a 2-inch biscuit cutter, cut out biscuits and place in prepared camp Dutch oven. Gently press together remaining dough and roll out to 3/4 inch thickness to cut more biscuits. (I had a more dough than I could fit in my 12-inch Dutch oven. You can save these remaining biscuits in plastic wrap in the freezer). Brush tops of biscuits with heavy cream and sprinkle with salt.
  12. OPTION: These unbaked biscuits freeze beautifully. If you don't want to bake all of the biscuits now, place the unbaked biscuits in a zip top bag and remove as much air as possible. Do not thaw before baking. To bake a smaller batch in a smaller Dutch oven, adjust the charcoal according to a chart or the Dutch Oven Helper. We added more heat the lid but kept the bottom as directed.
  13. Fire up a chimney of charcoal. When the charcoal's tips are grey, make a circle of 10 hot charcoal to fit beneath the bottom of the 12-inch camp Dutch oven. Place oven over the circle of hot charcoal. Add 23 hot charcoals around the lid of the oven. Wrap in aluminum flashing or wind protector., Bake for 18-20 minutes, taking care to closely monitor the oven over the final two minutes by smelling the aroma from the oven. If you smell acrid burning, immediately remove lid and oven from charcoal. Do NOT lift the lid at any time to insure your oven remains at 425F.
Share this Recipe
Powered byWP Ultimate Recipe
Tagged , , , , | Leave a comment