Yesterday, I did a test run on the bread recipe that will be used in our “hands on” baking class at the next Dutch Oven Gathering (DOG). A few friends need encouragement to try baking in their black pots, so my goal is to walk them through each step and show them that they can bake a beautiful challah bread with charcoal. Since I haven’t baked a braided challah in a 12″ camp Dutch oven, I needed to try the recipe at home in order to be prepared for the class. In this post, I will share how I made the dough and prepared the 12″ Dutch oven for the bread. In the next post, I will show how it turned out and share the lessons I learned. I am also looking forward to sharing the results of the class as well!
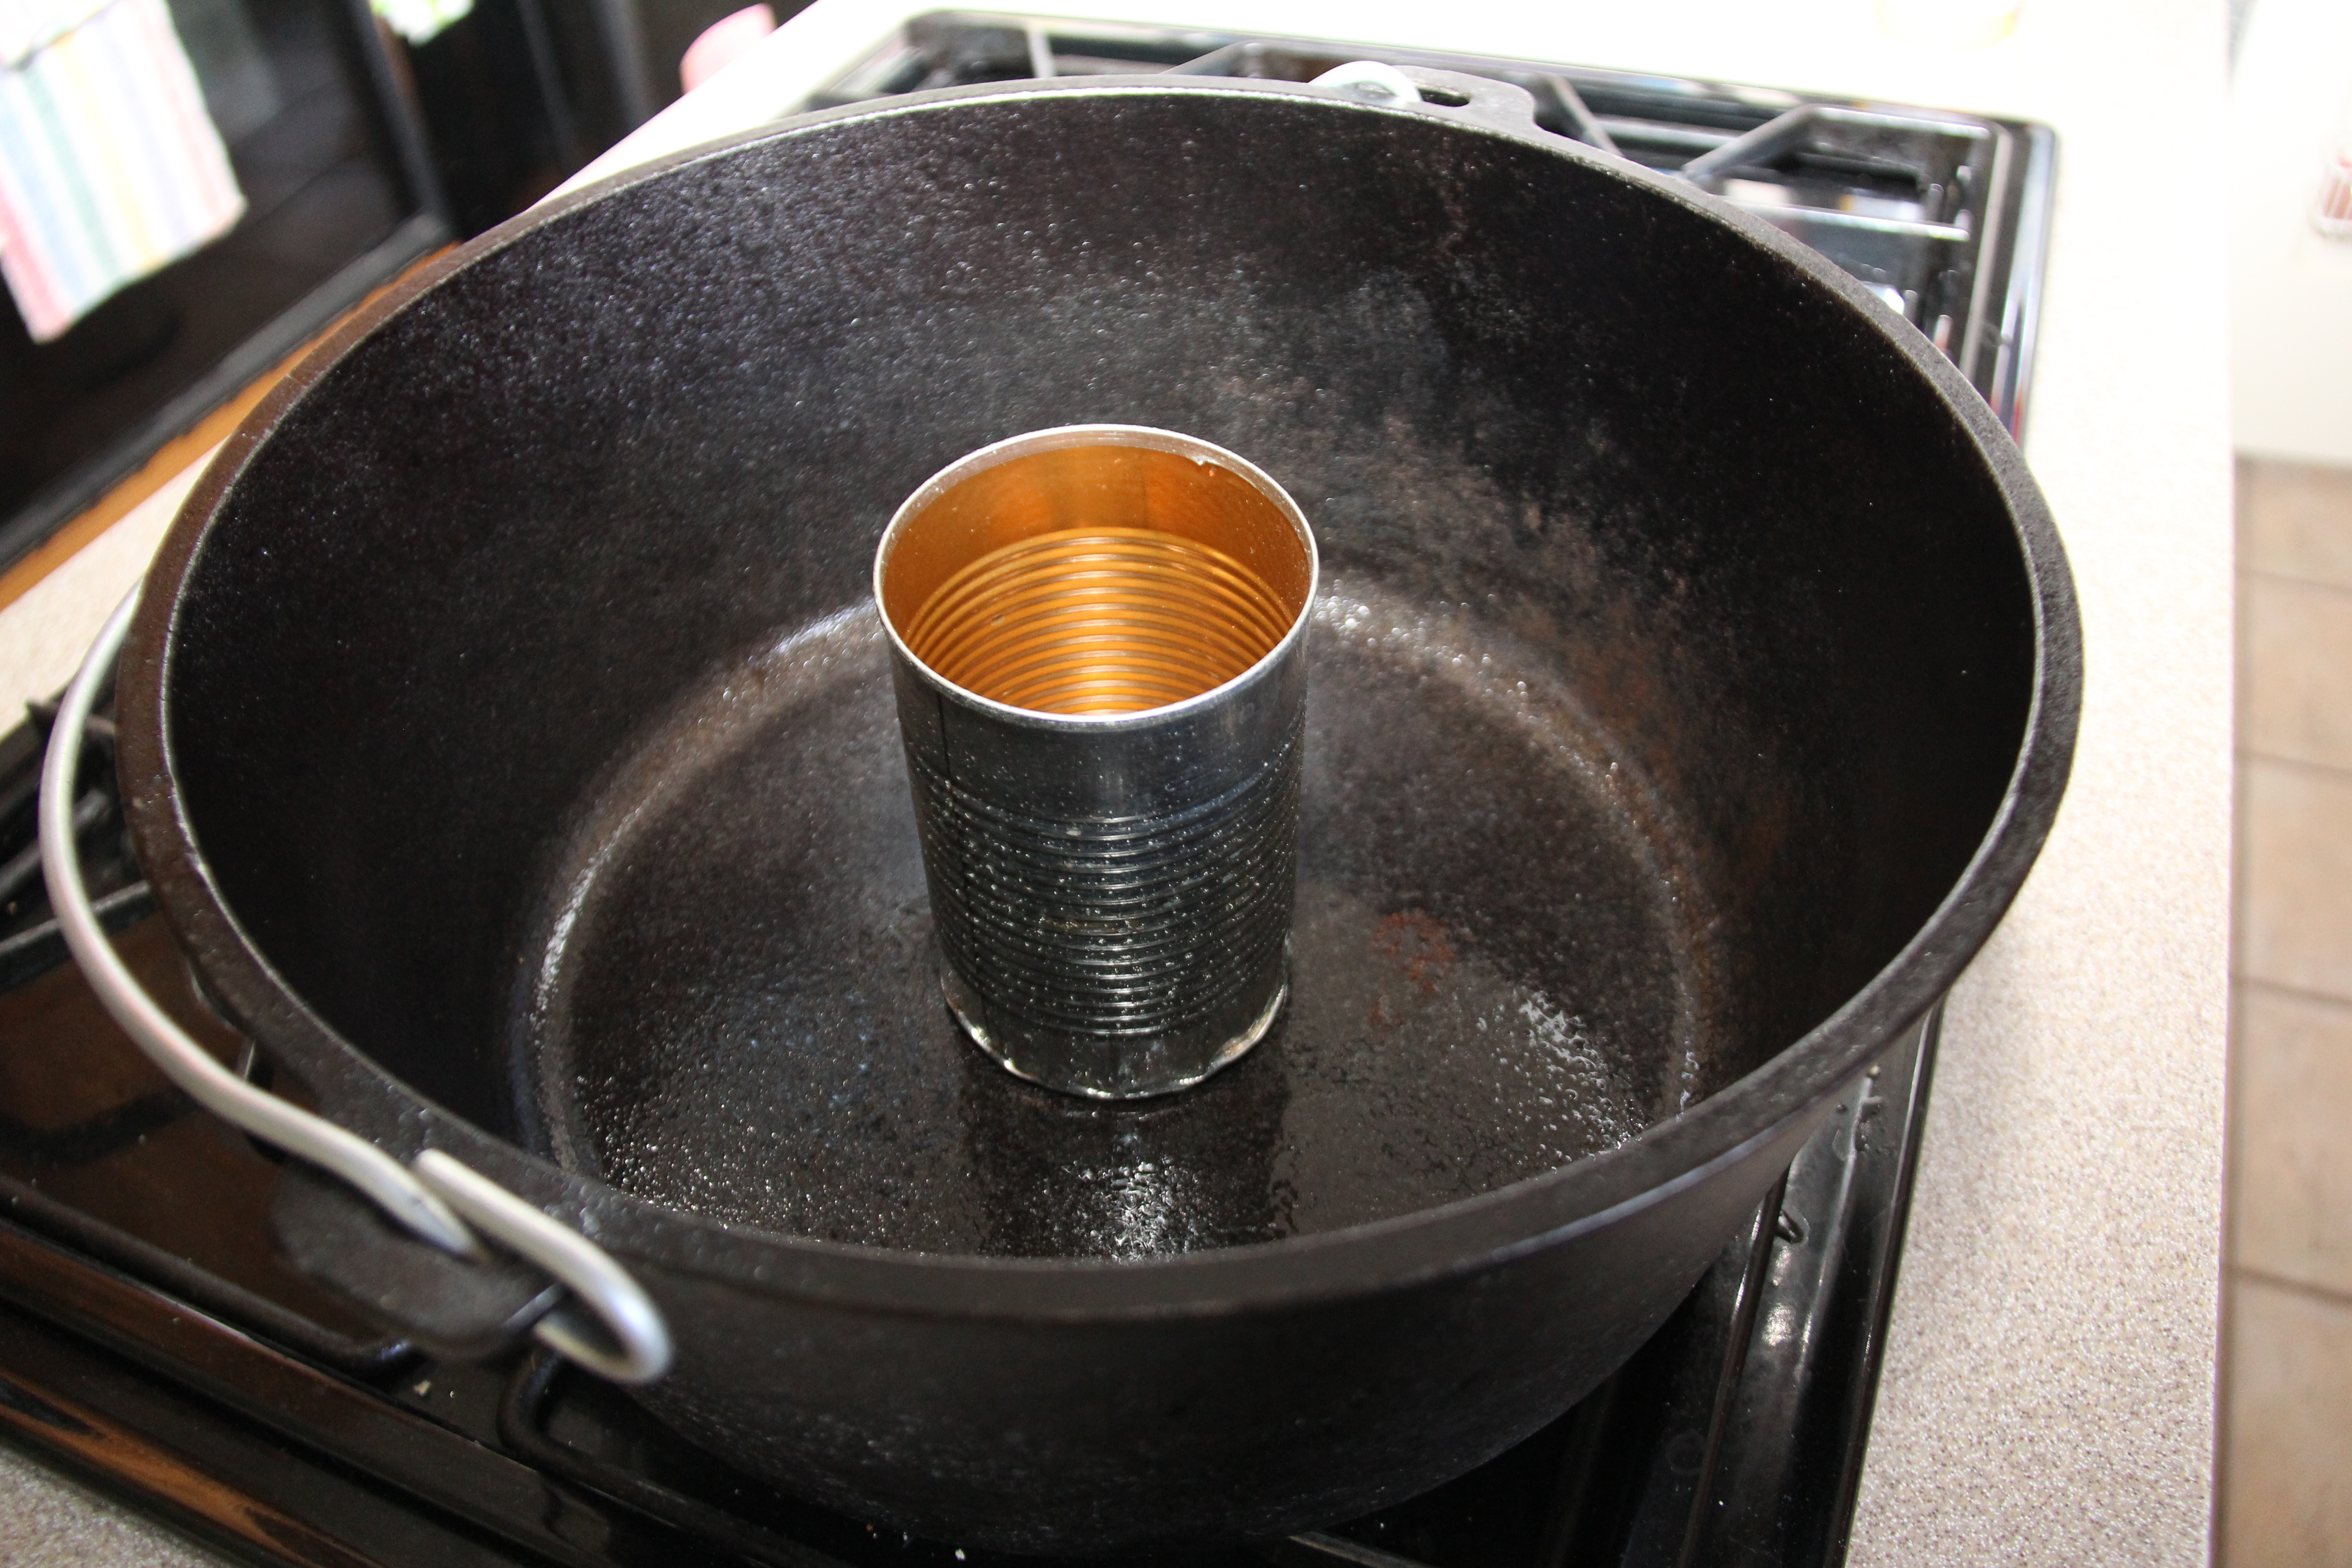
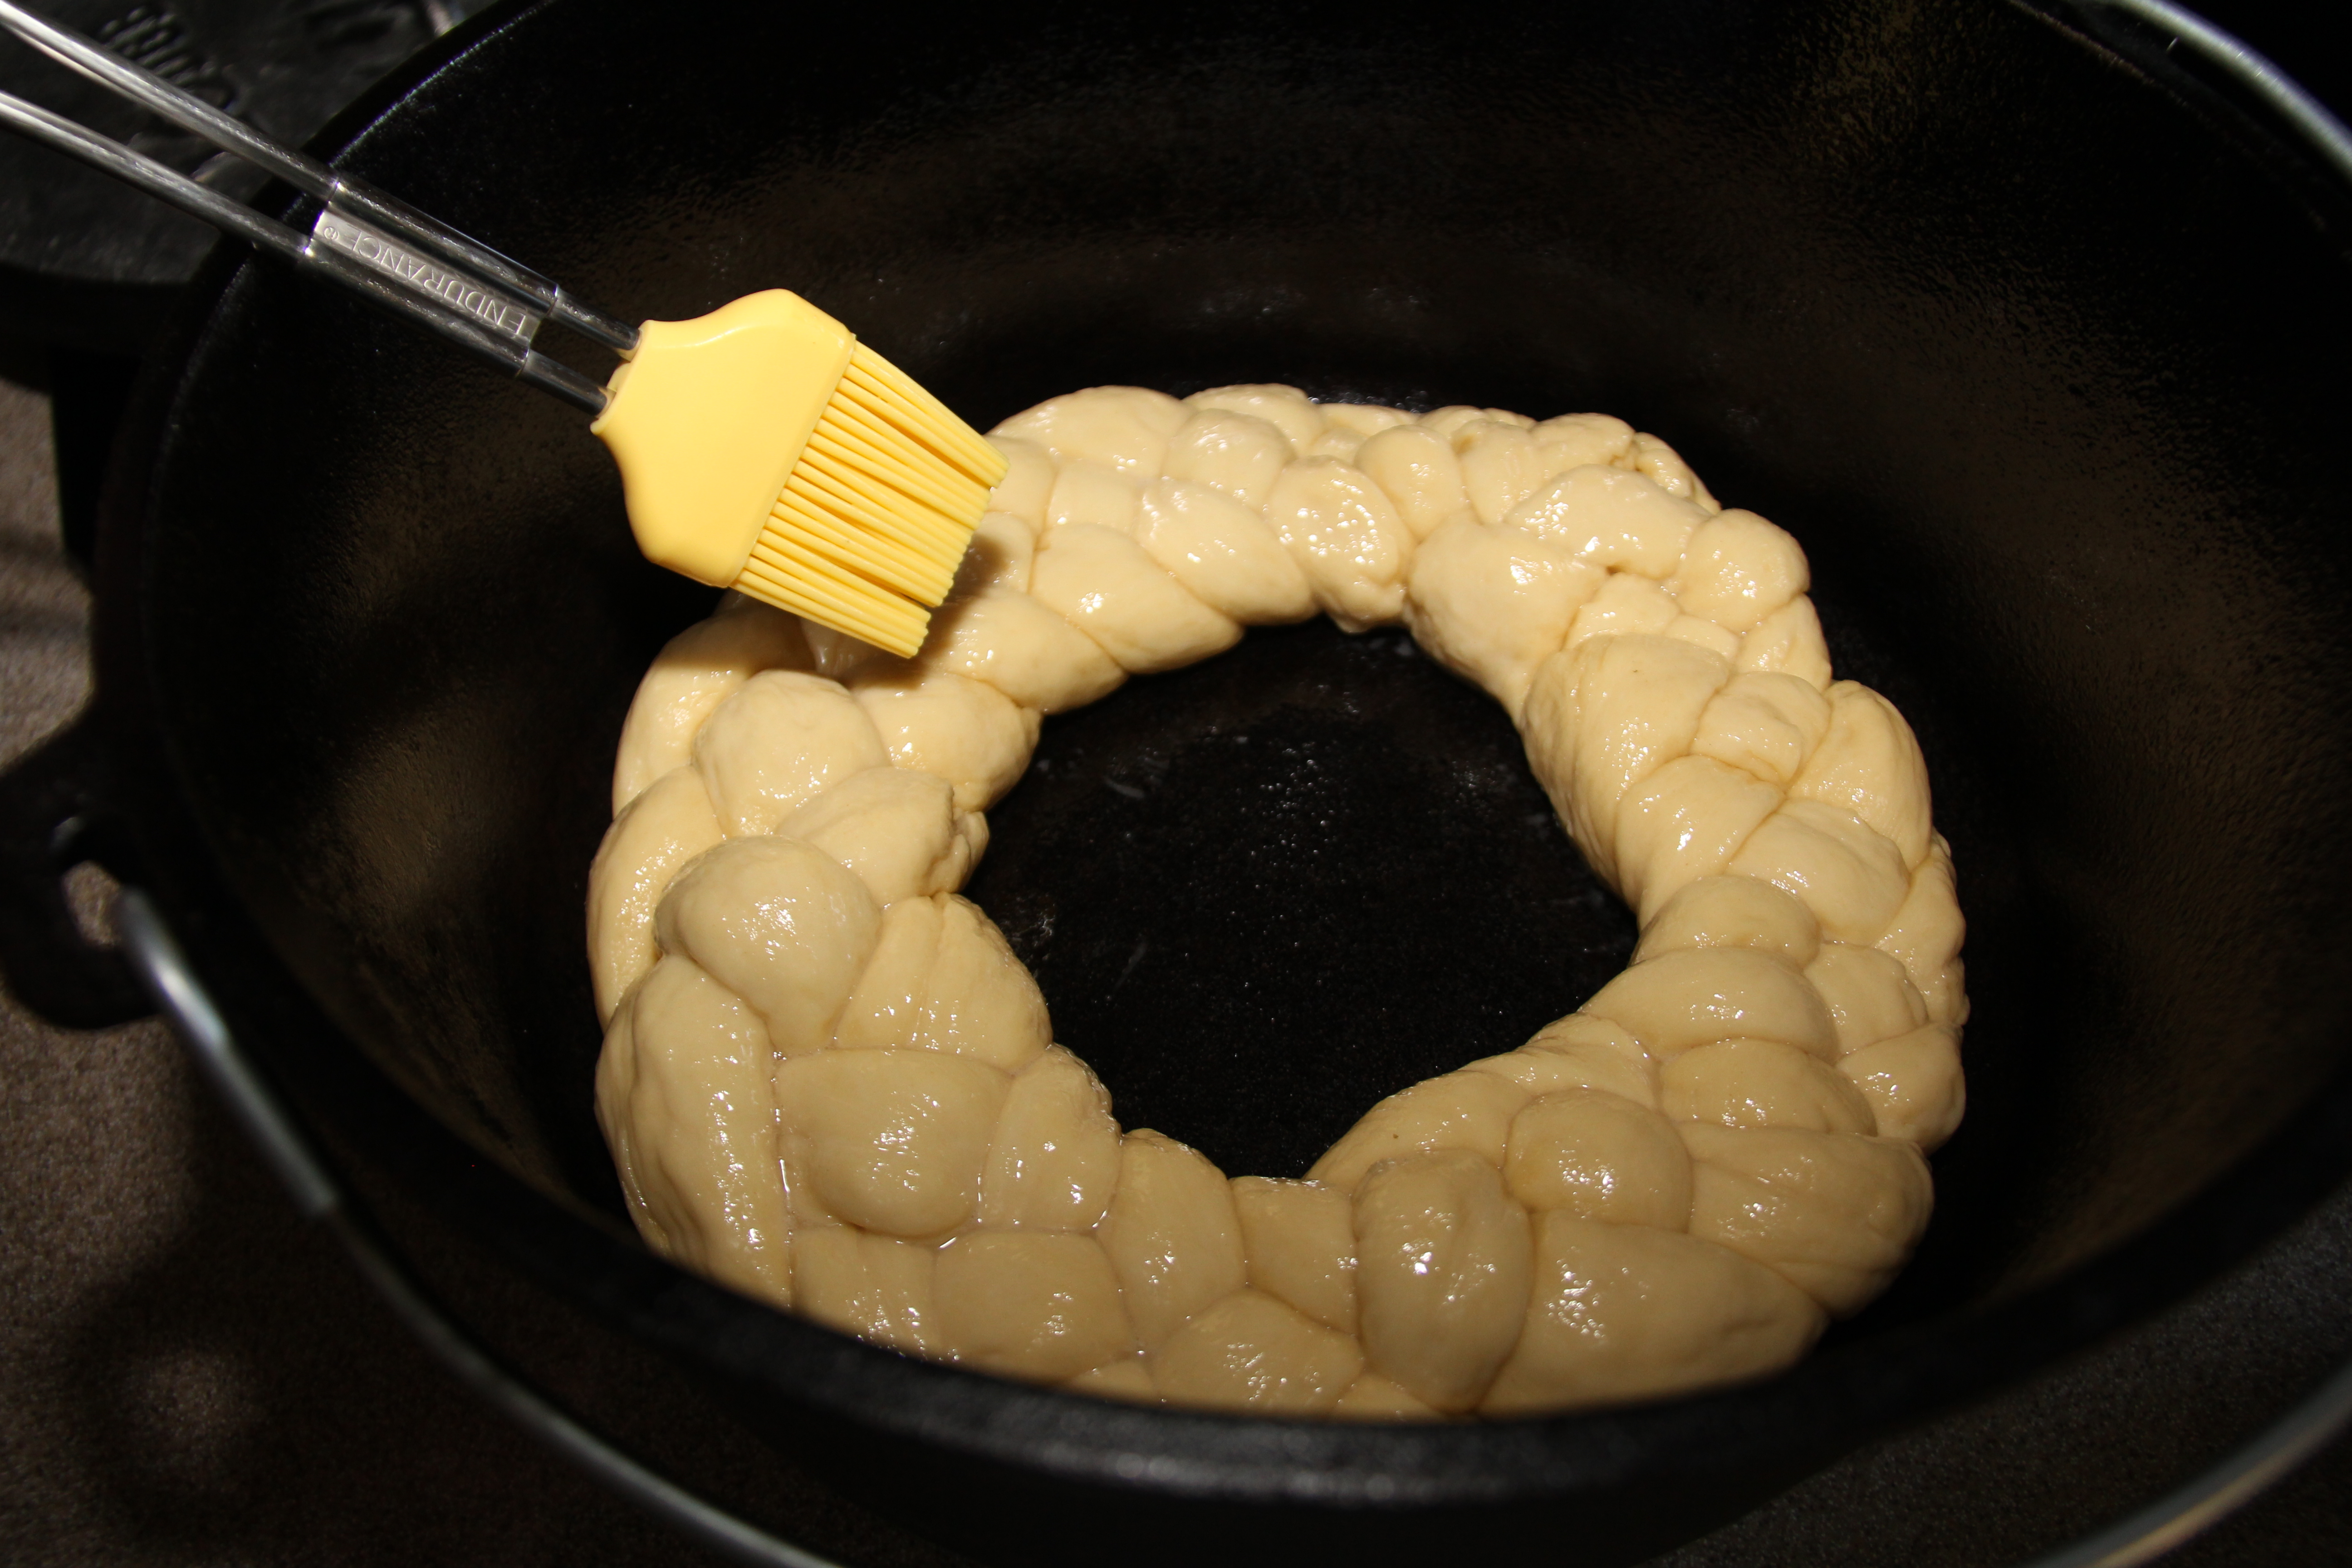
The first thing I did was prepare the 12″ camp Dutch oven by placing a clean soup can in the middle of the oven. I removed both the top and bottom of the can and carefully pressed any sharp edged in using the flat side of a knife. I also removed the gummy glue that holds the paper lable to the can and washed it with hot soapy water. I sprayed the can and oven liberally with Pam. I haven’t dusted my Dutch oven with flour as I would with a traditional bread pan form since the seasoning on the Dutch oven is a lovely surface that doesn’t allow the bread dough to stick. If it did, then I’d get my better half to reseason the oven.
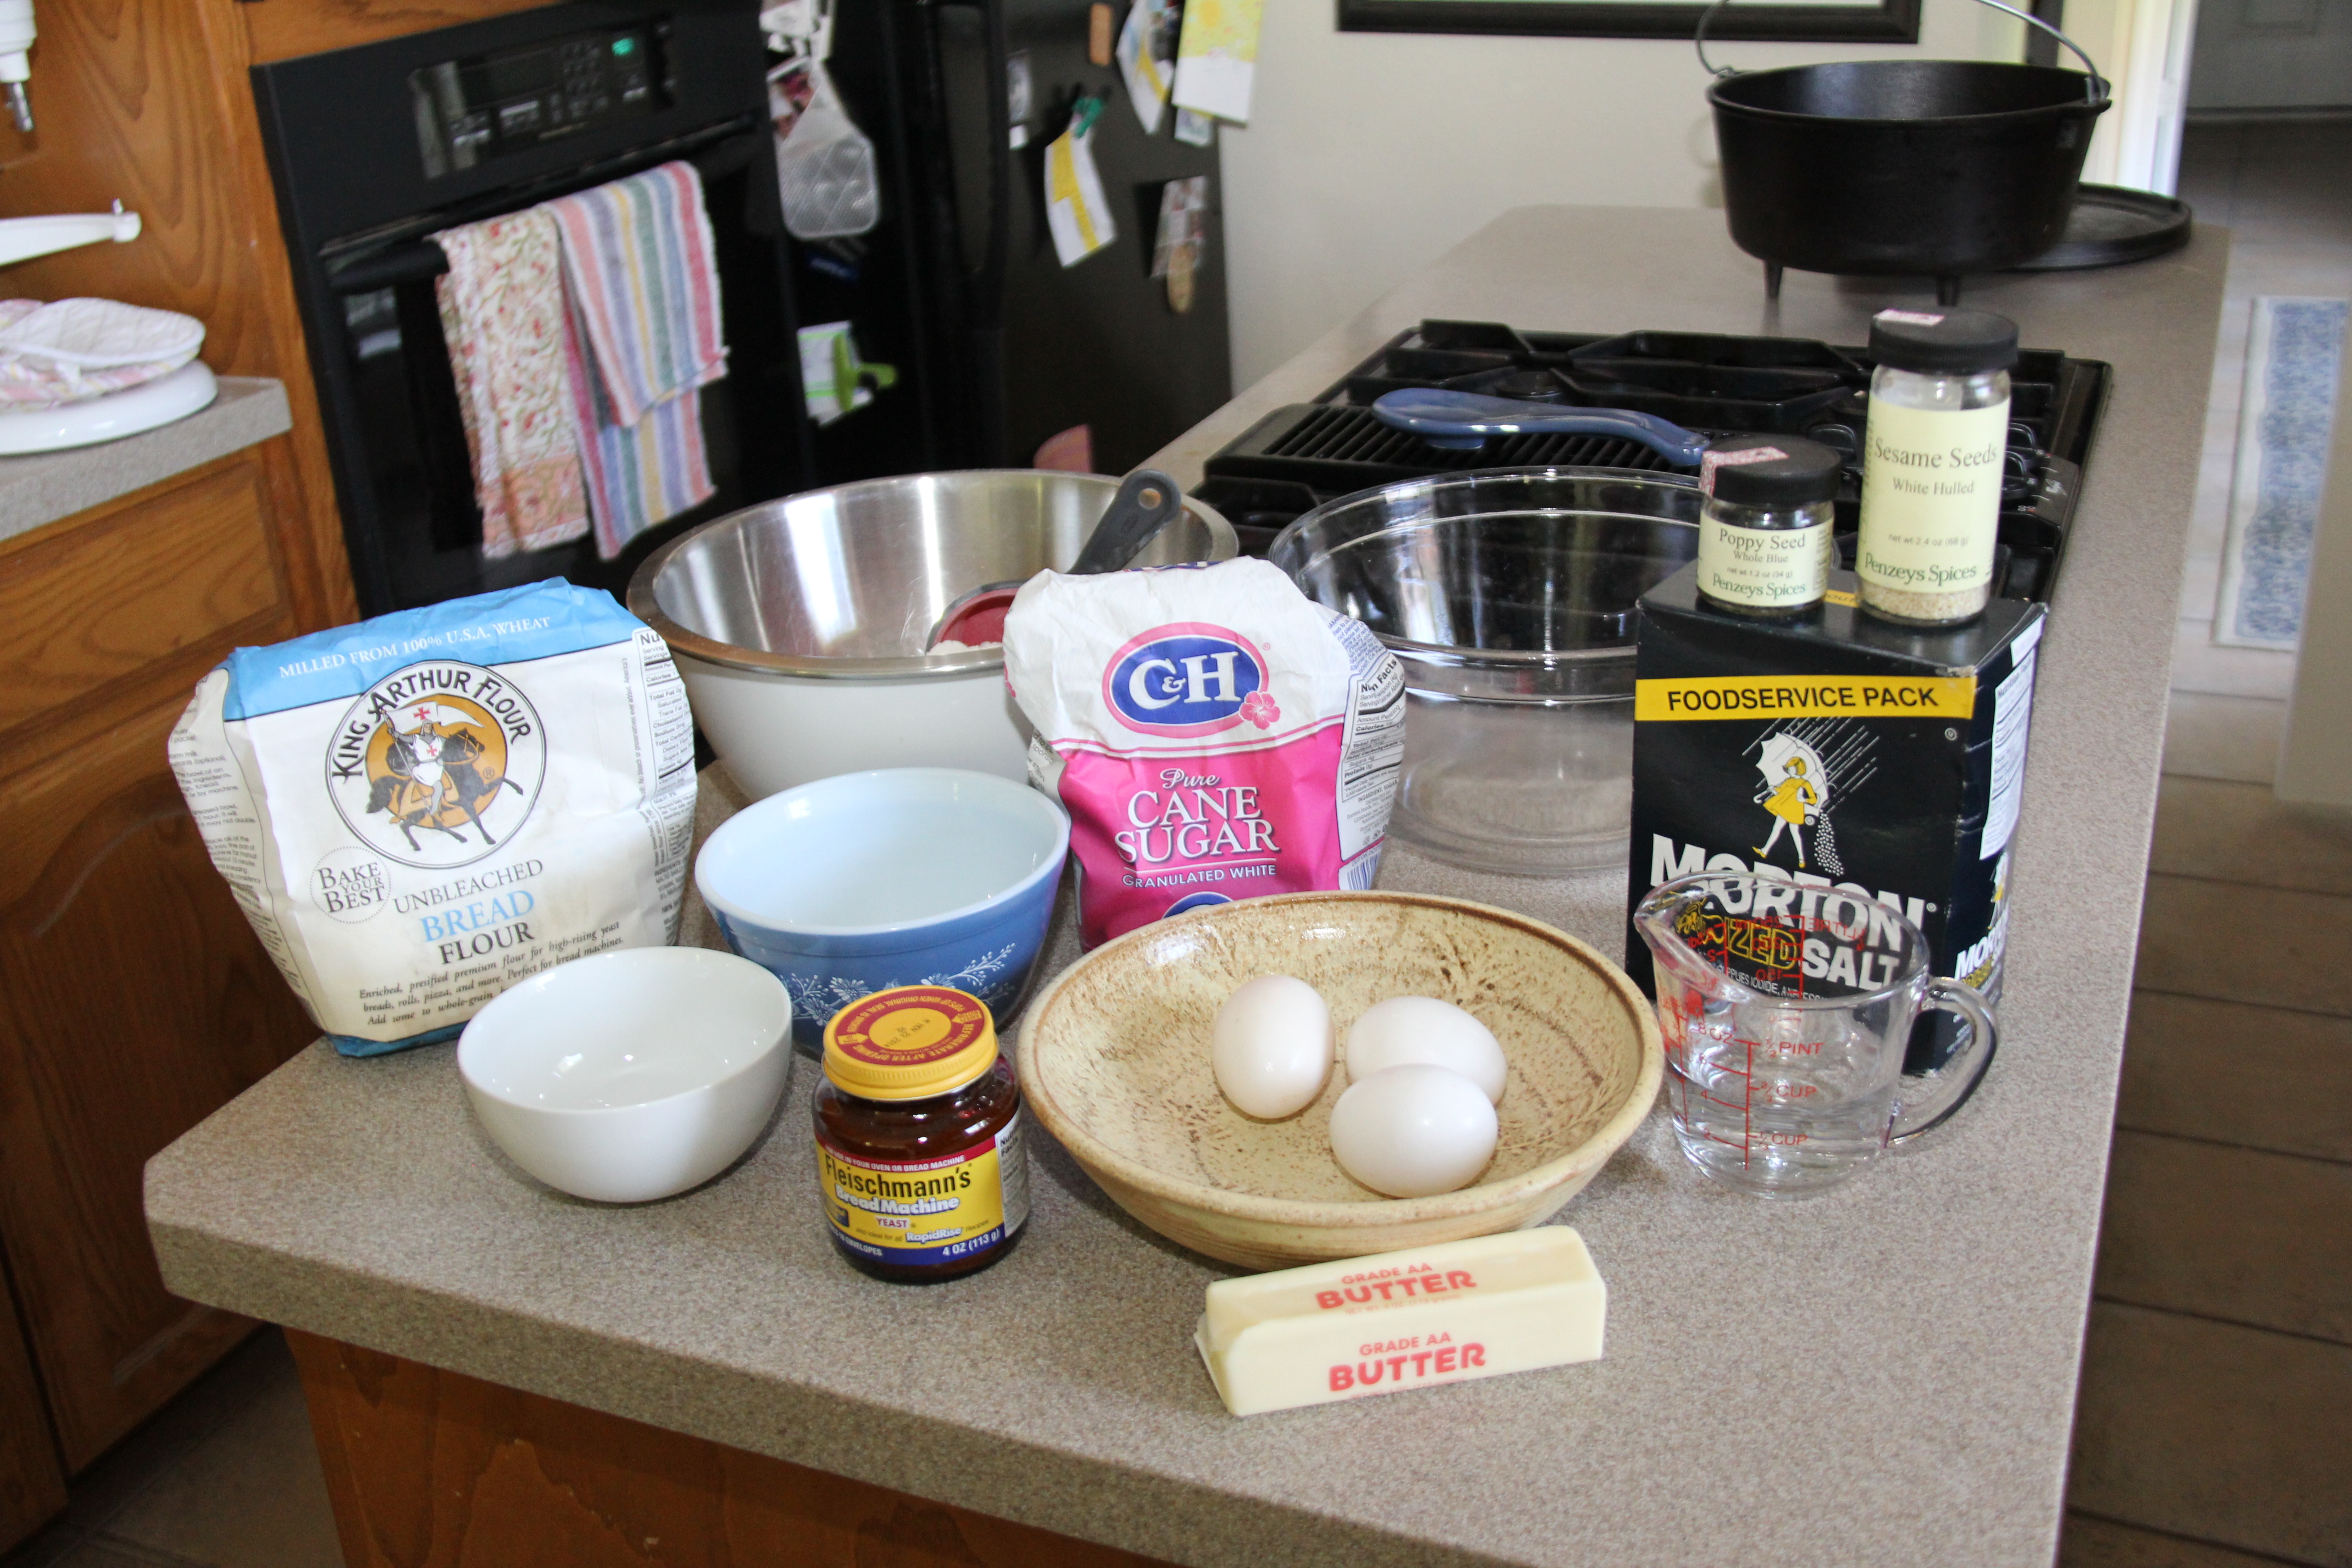
Next, I gathered up my ingredients and equipment.
- 3 to 3 1/4 cups King Arthur Bread Flour
- 2 1/4 teaspoons rapid rise yeast
- 1/4 cup sugar
- 1 1/2 teaspoon salt
- 3 large eggs, room temperature
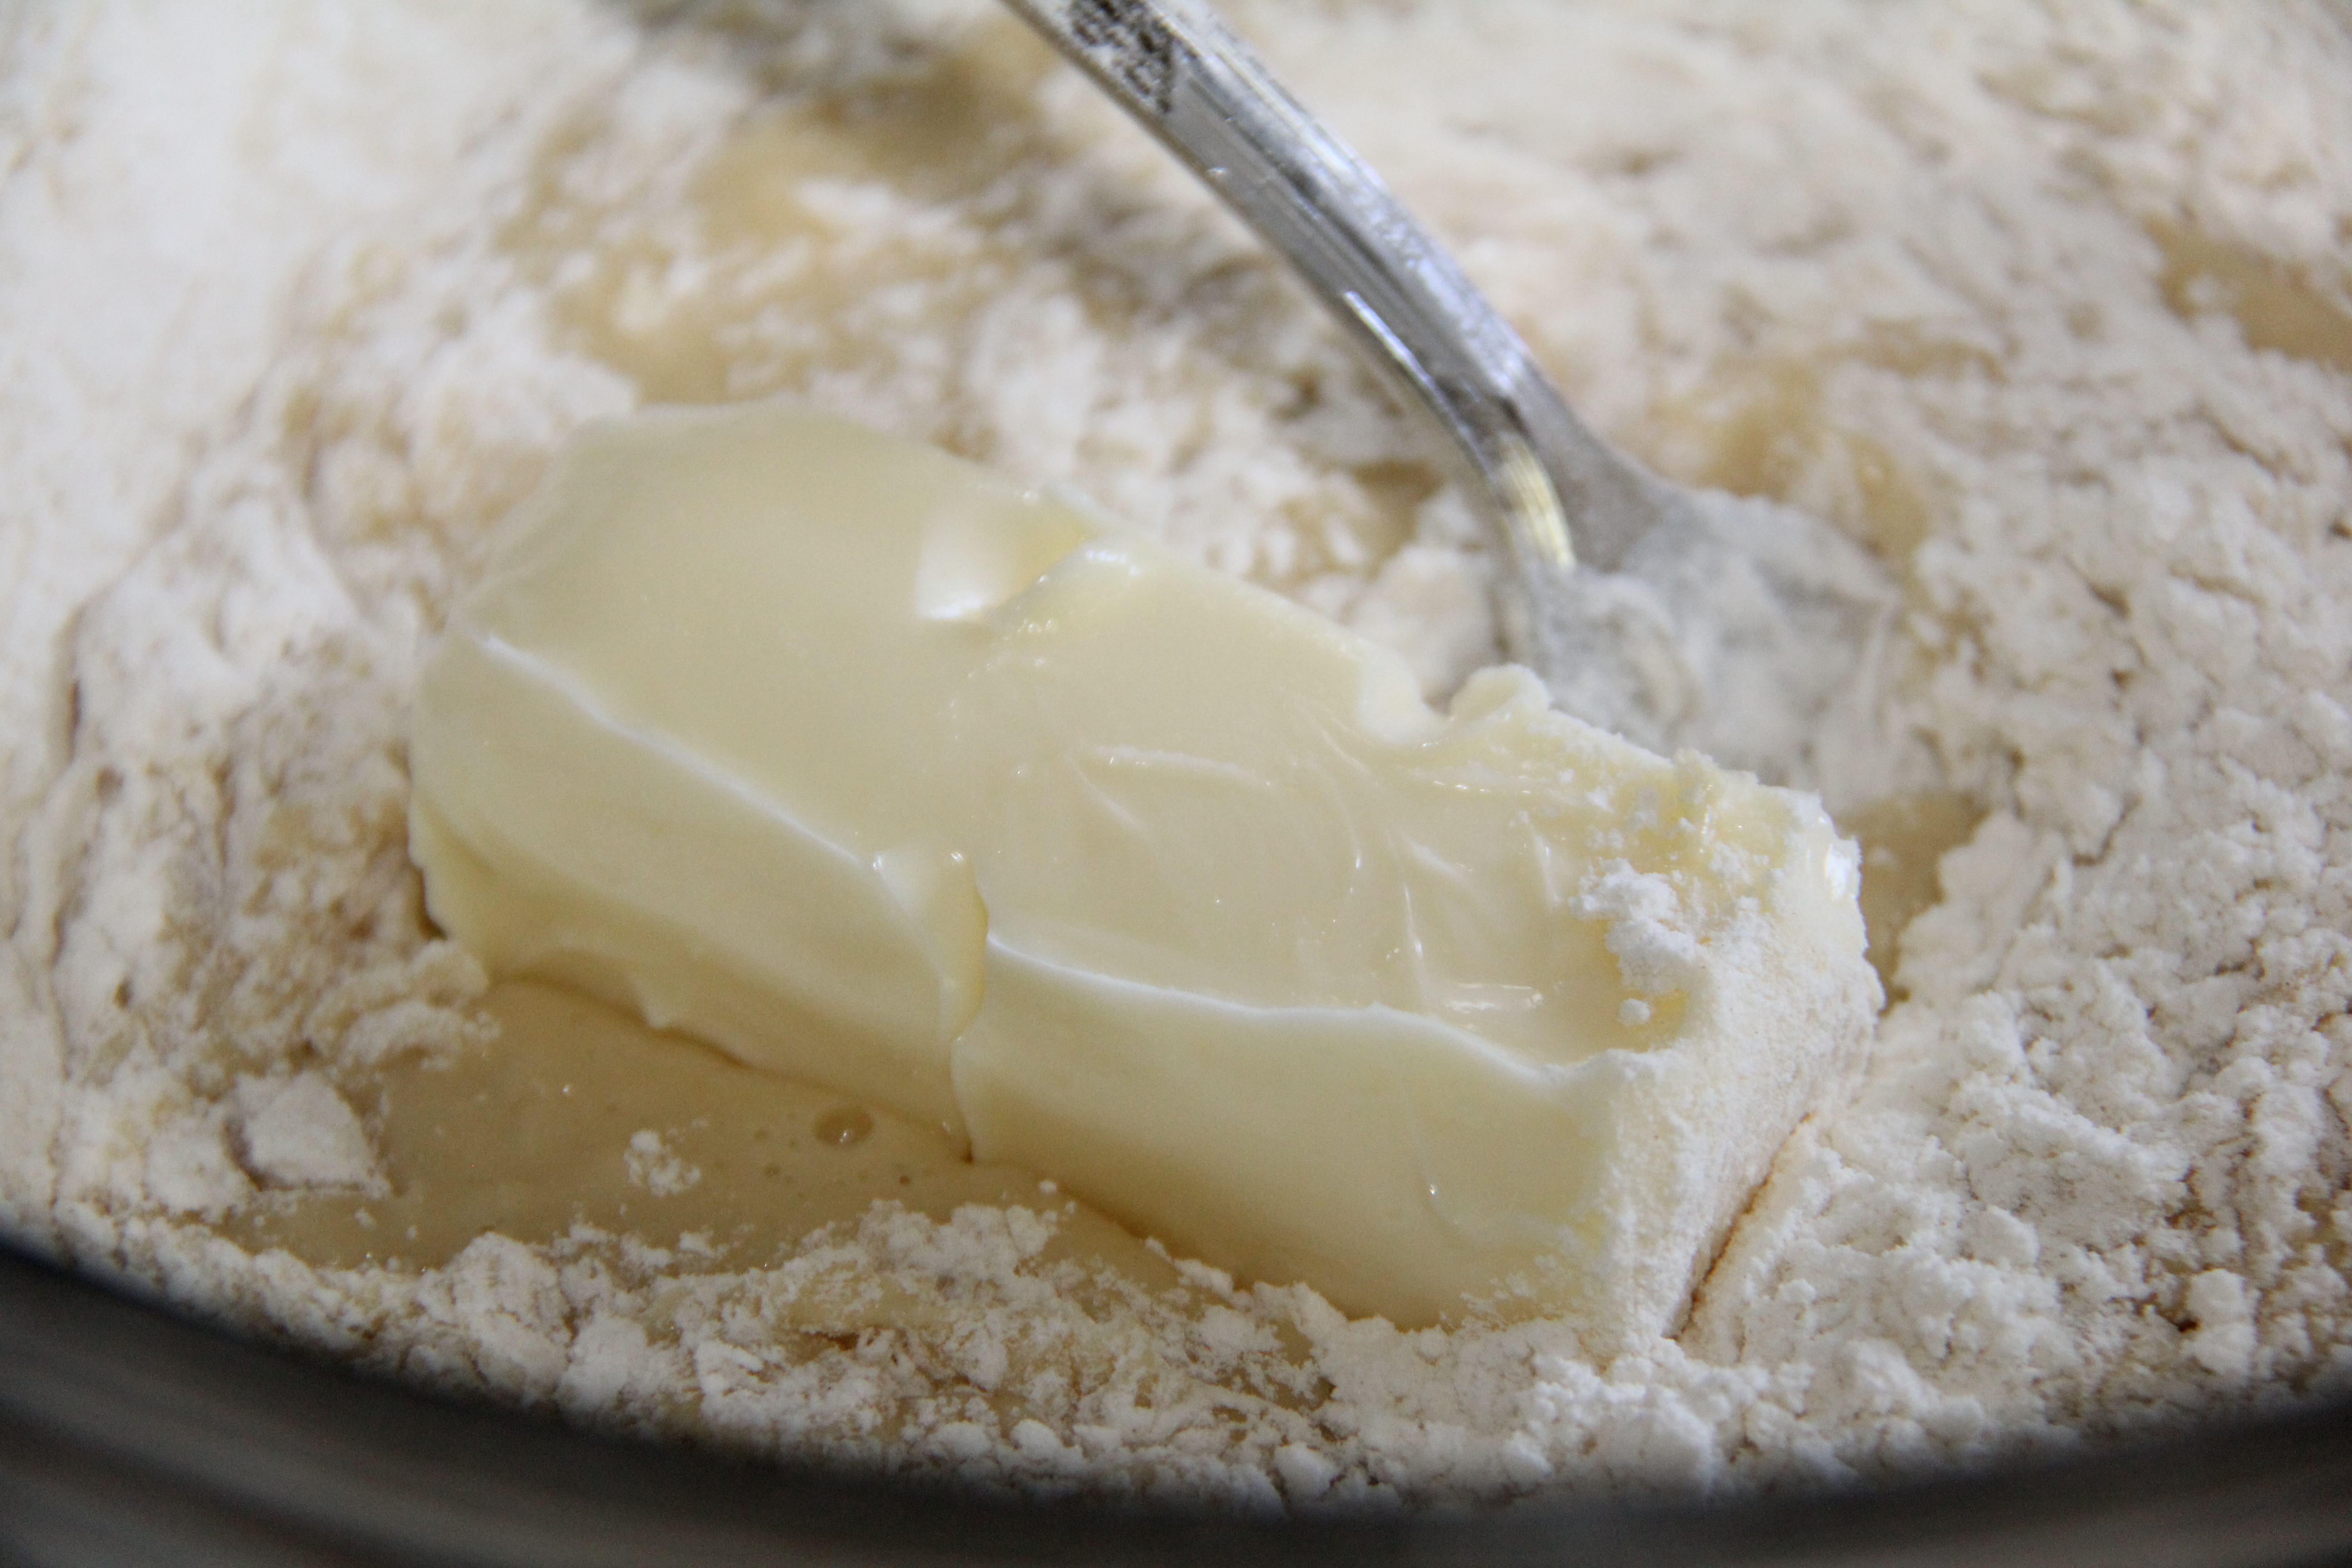
- 8 tablespoons butter, very soft
- 1/2 cup plus one tablespoon distilled water
- Poppy seeds, sesame seeds, Kosher Salt for decoration
I measure out the total amount of flour into a seperate bowl so that I don’t lose track of how much flour has gone into the dough. Every time we bake bread, the final amount of flour used changes due to the different environmental condtions (humidity, air temperature). It reduces the chance of making the mistake of putting too much flour into the dough.
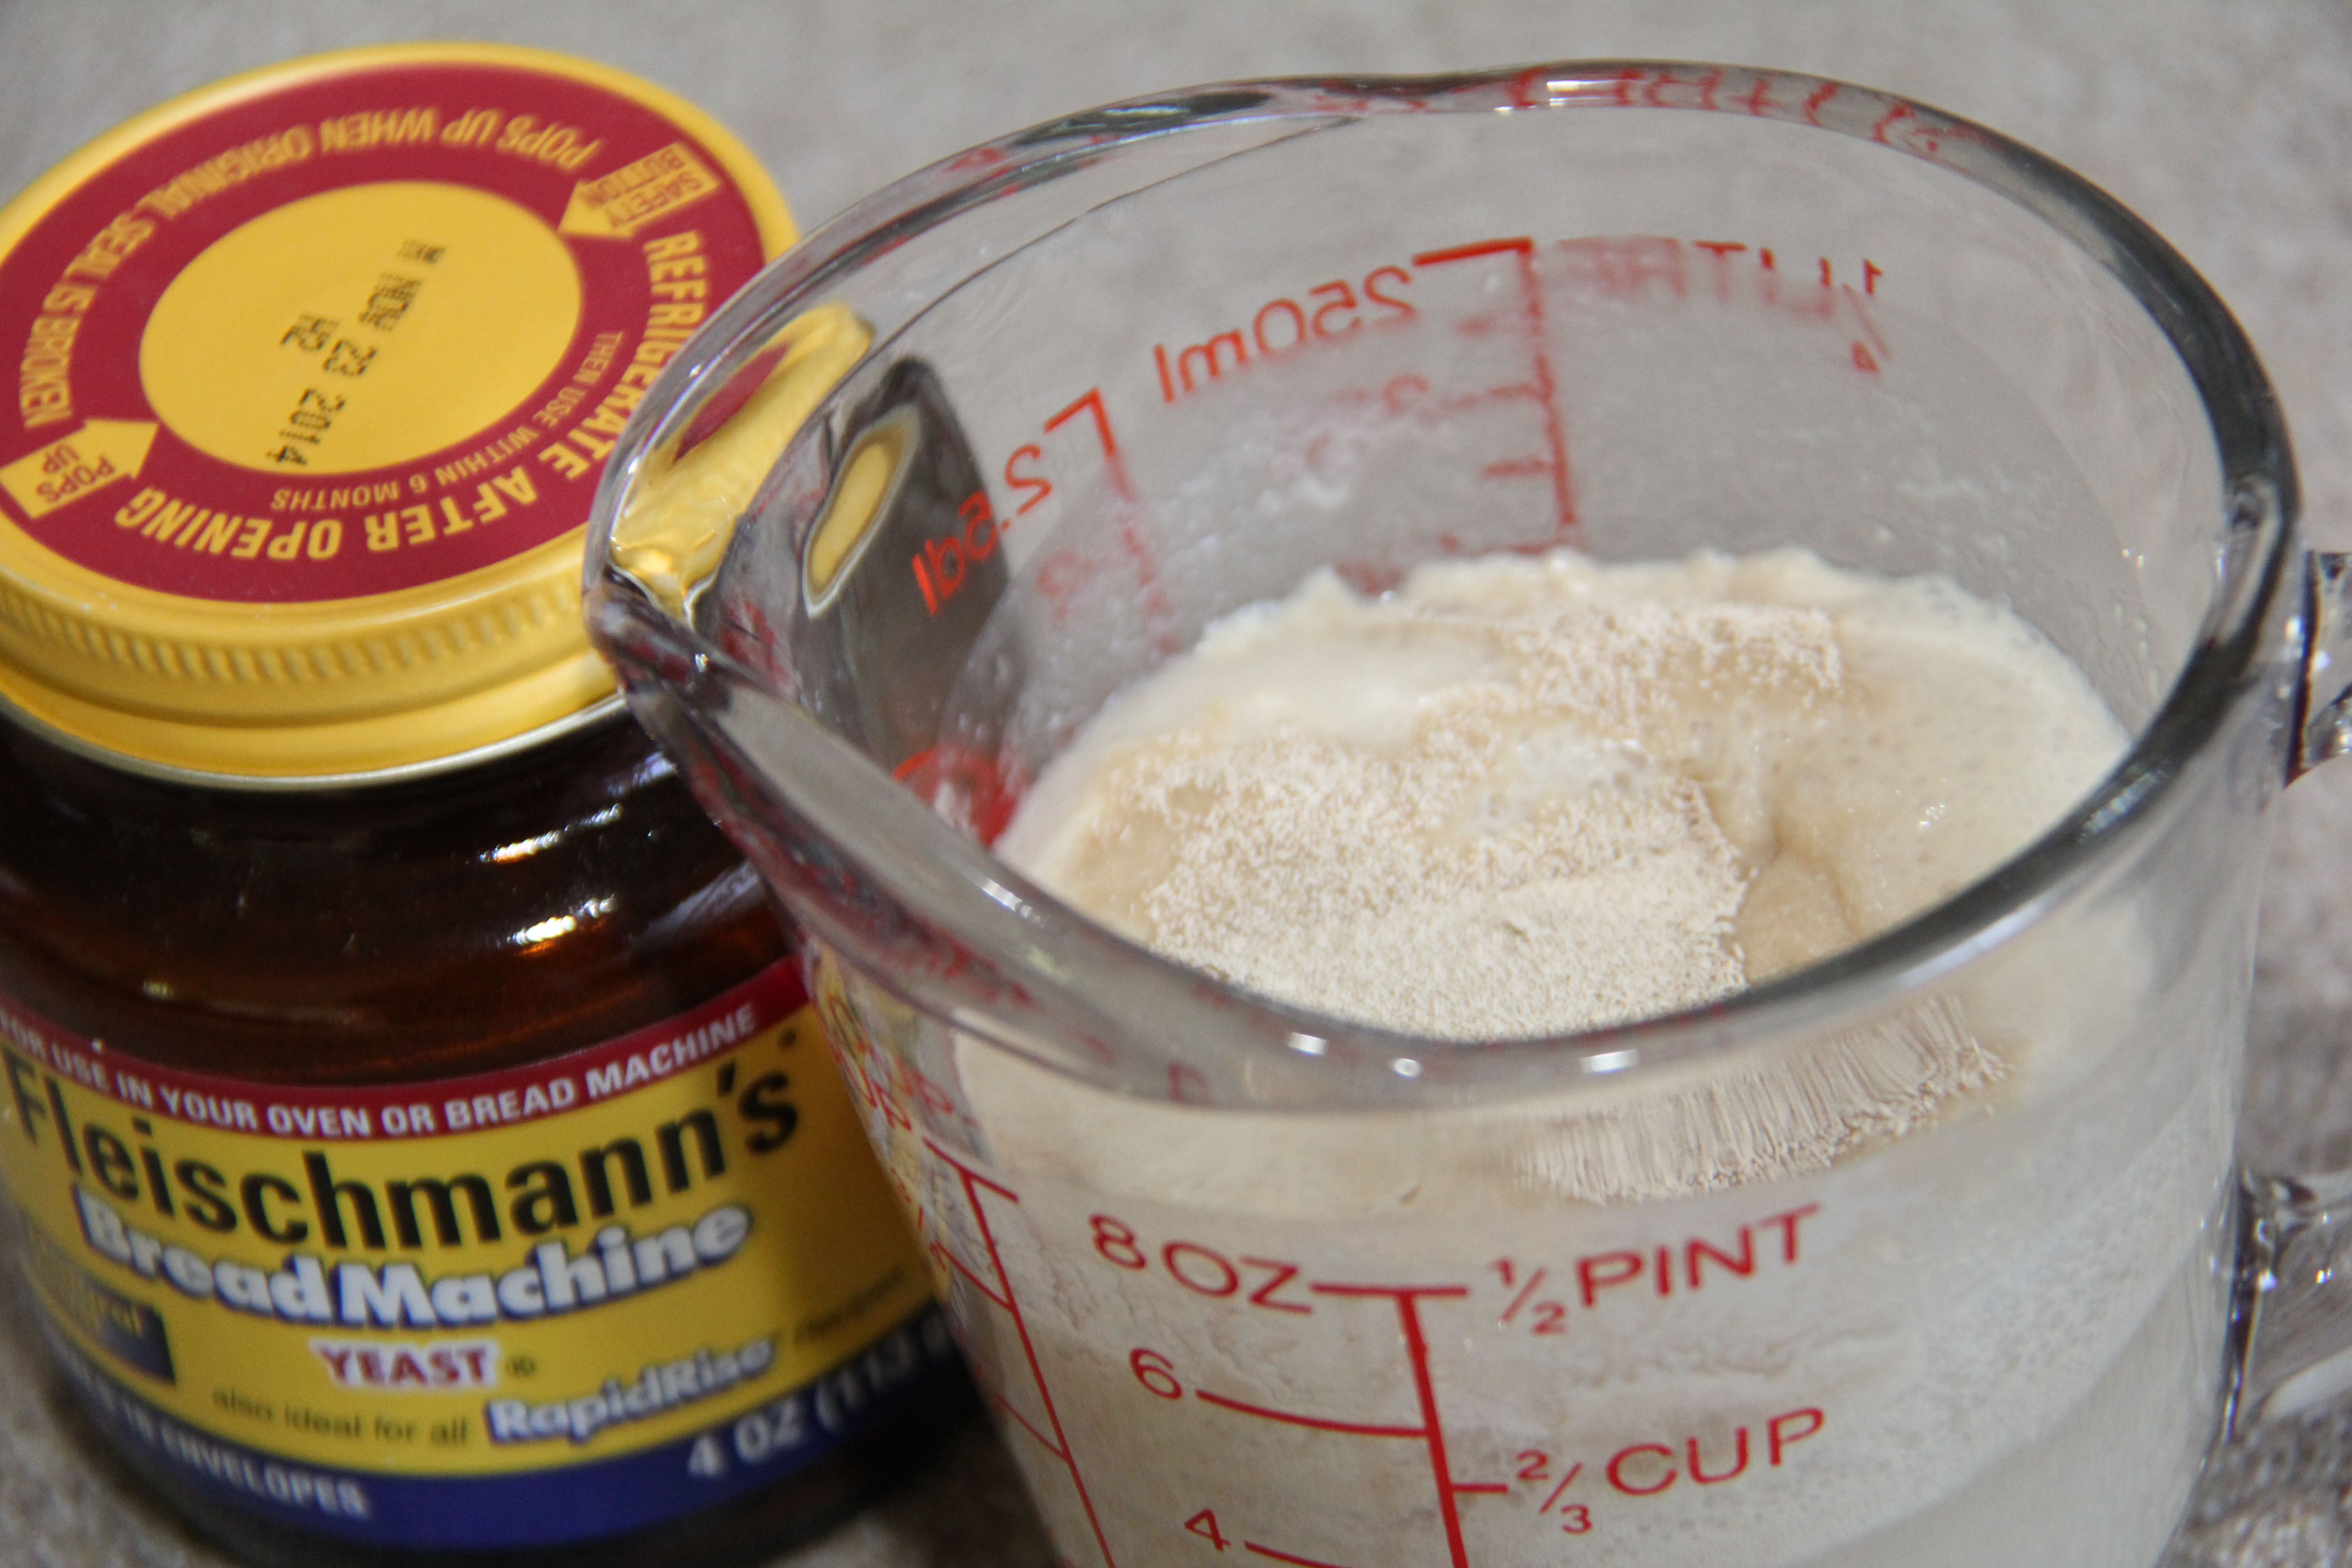
Next I place a tablespoon of the sugar into a heat-proof liquid measuring cup, add distilled water, and warm the liquid to 105 to 110 degrees Fahrenheit. The instant-read Thermapen is such a helpful tool in the kitchen!! I don’t want the water too hot or not hot enough; it needs to be “just right” for the yeast. Add the yeast and let sit until it is creamy and bubbles are forming. If the yeast is dead, it won’t bubble. Better to find this out now when starting over is easy and not much time is lost.
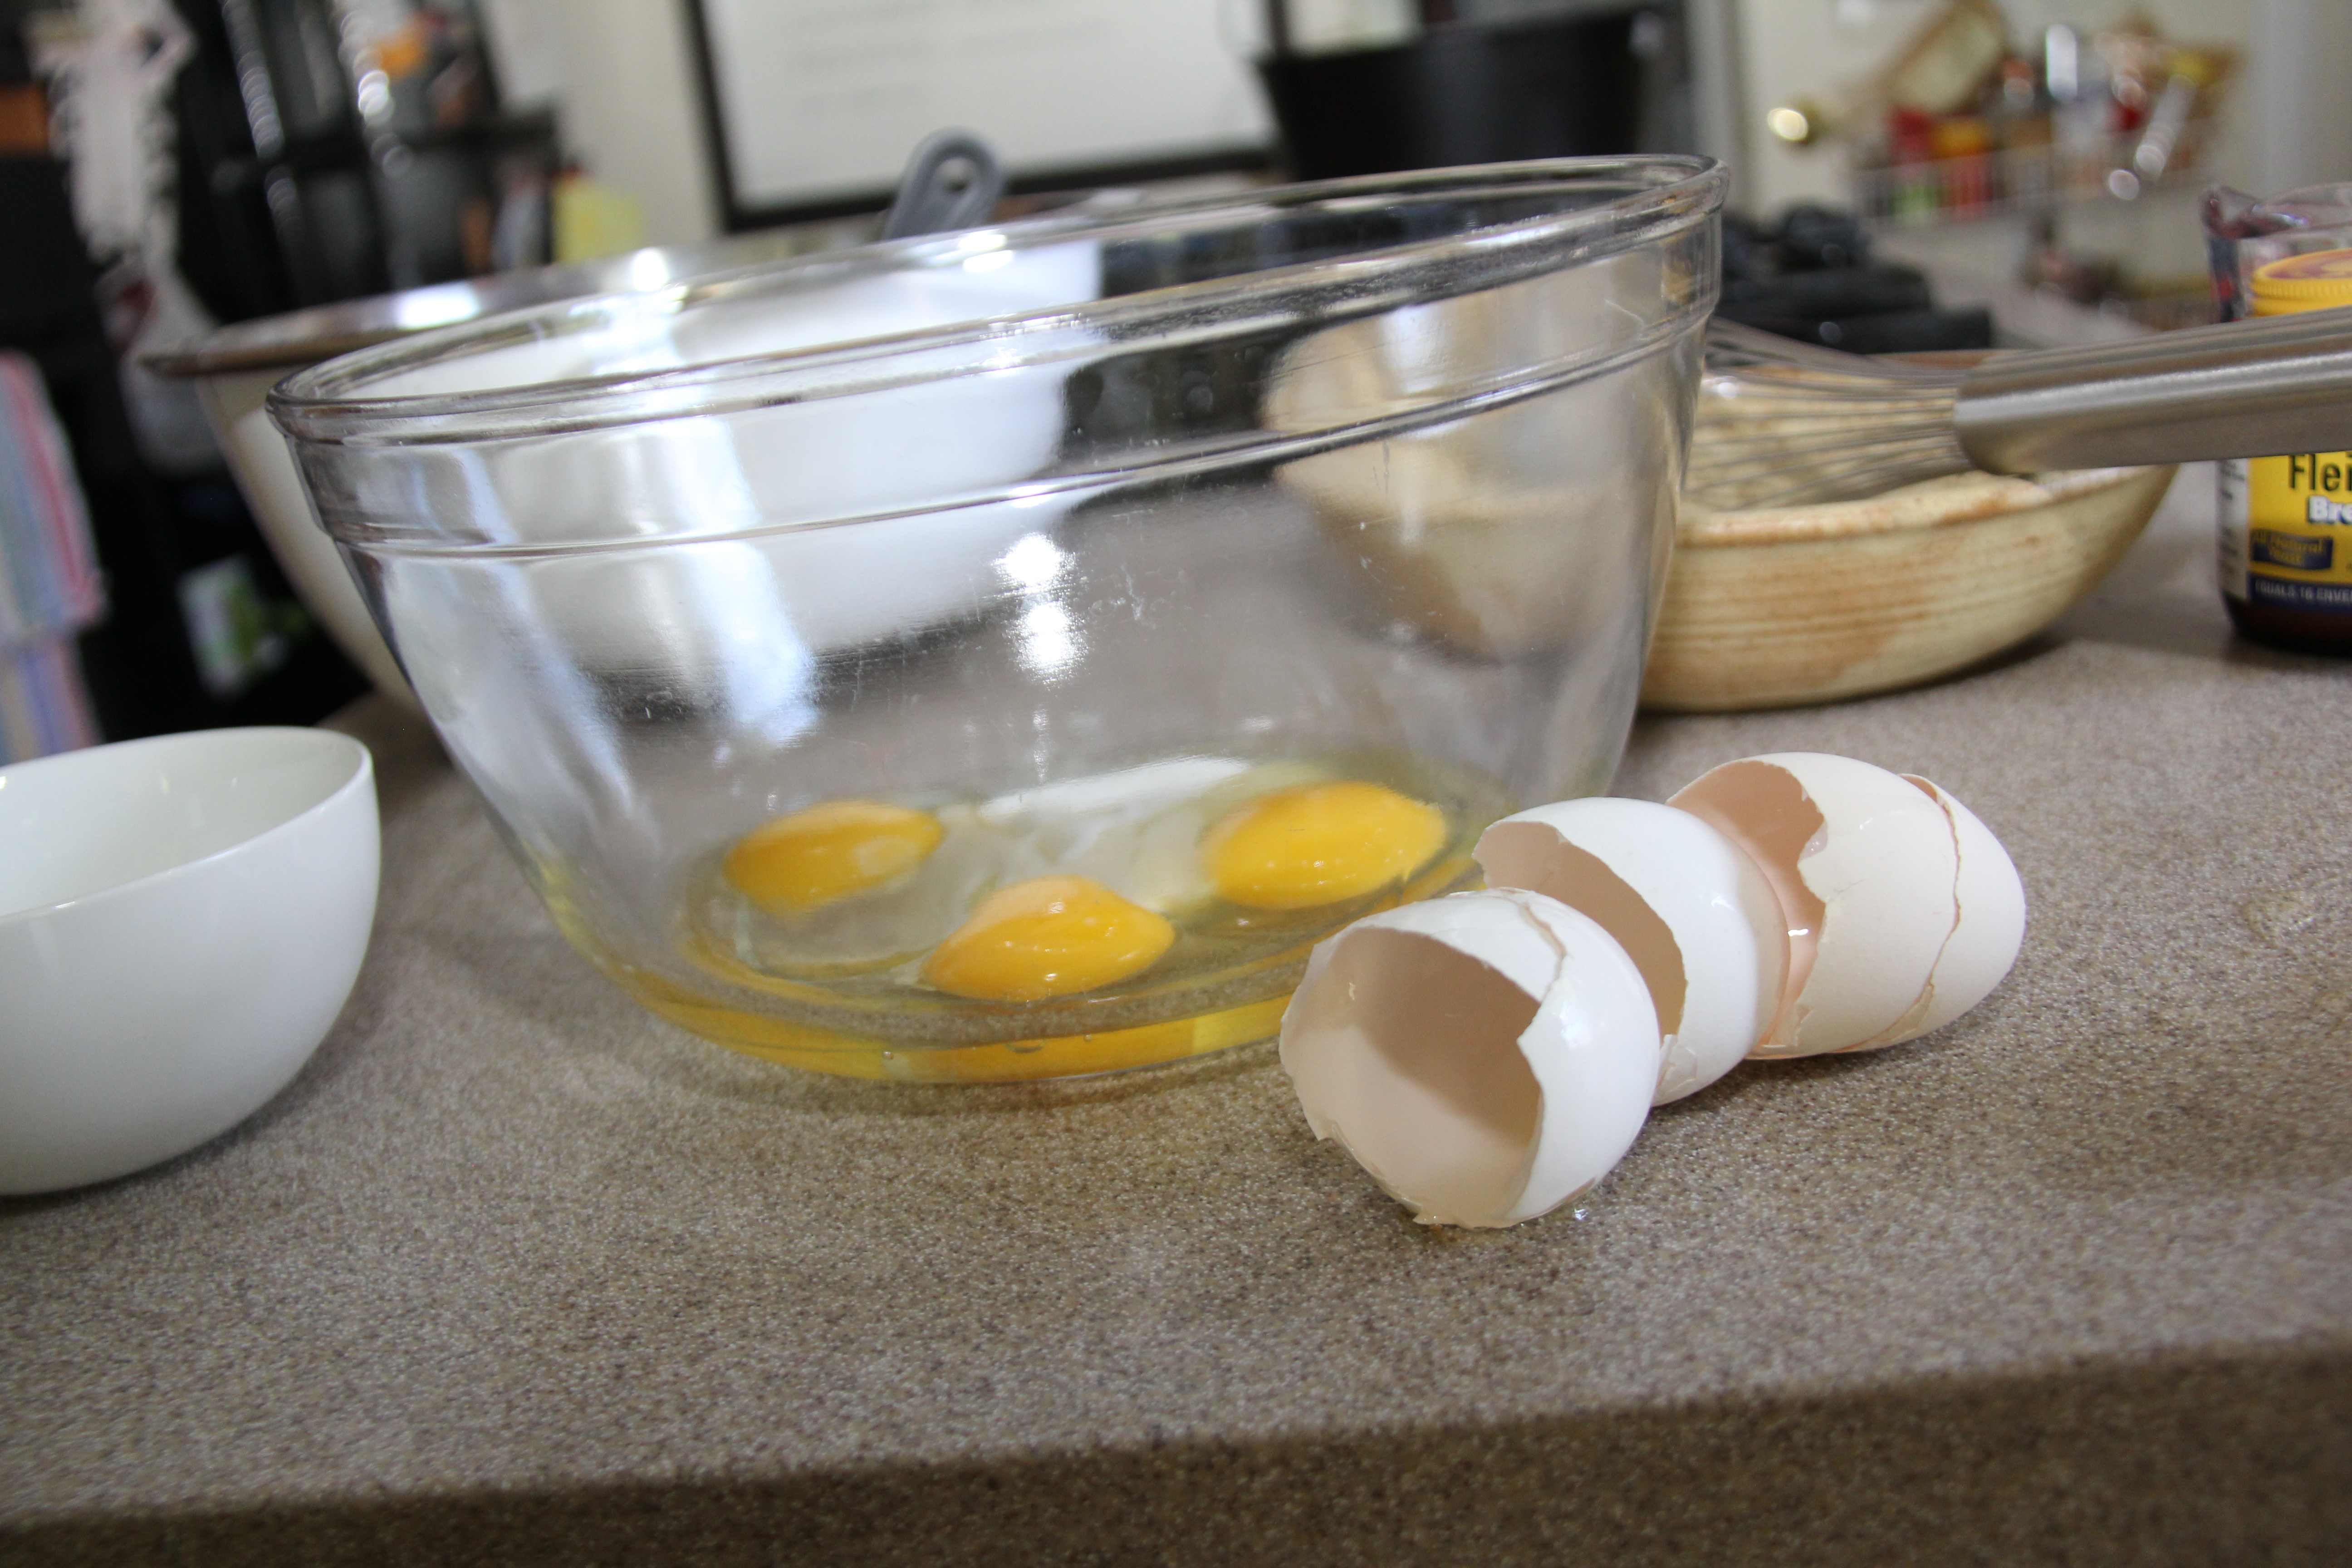 In a big bowl, add two eggs and one egg yolk, and set aside the remaining egg white for the wash just before baking the bread. Whisk in the sugar, creamy yeast, salt and butter then flour, a half a cup at a time.
 When the dough is stiff but slightly sticky, turn out onto floured surface and gently knead for about ten minutes. I really like this video by King Arthur Flour that shows the proper technique for kneading bread. I also like their Yeast Dough Tips, including a simple explanation of what glutten does in the structure of bread. How do we know when to stop kneading? One way is the “glutten windowpane” test. The blog Wild Yeast explains nicely with photographs. Emma’s list posted on the website The Kitchen is also very helpful. Lots of great resources out there to encourage bakers!!
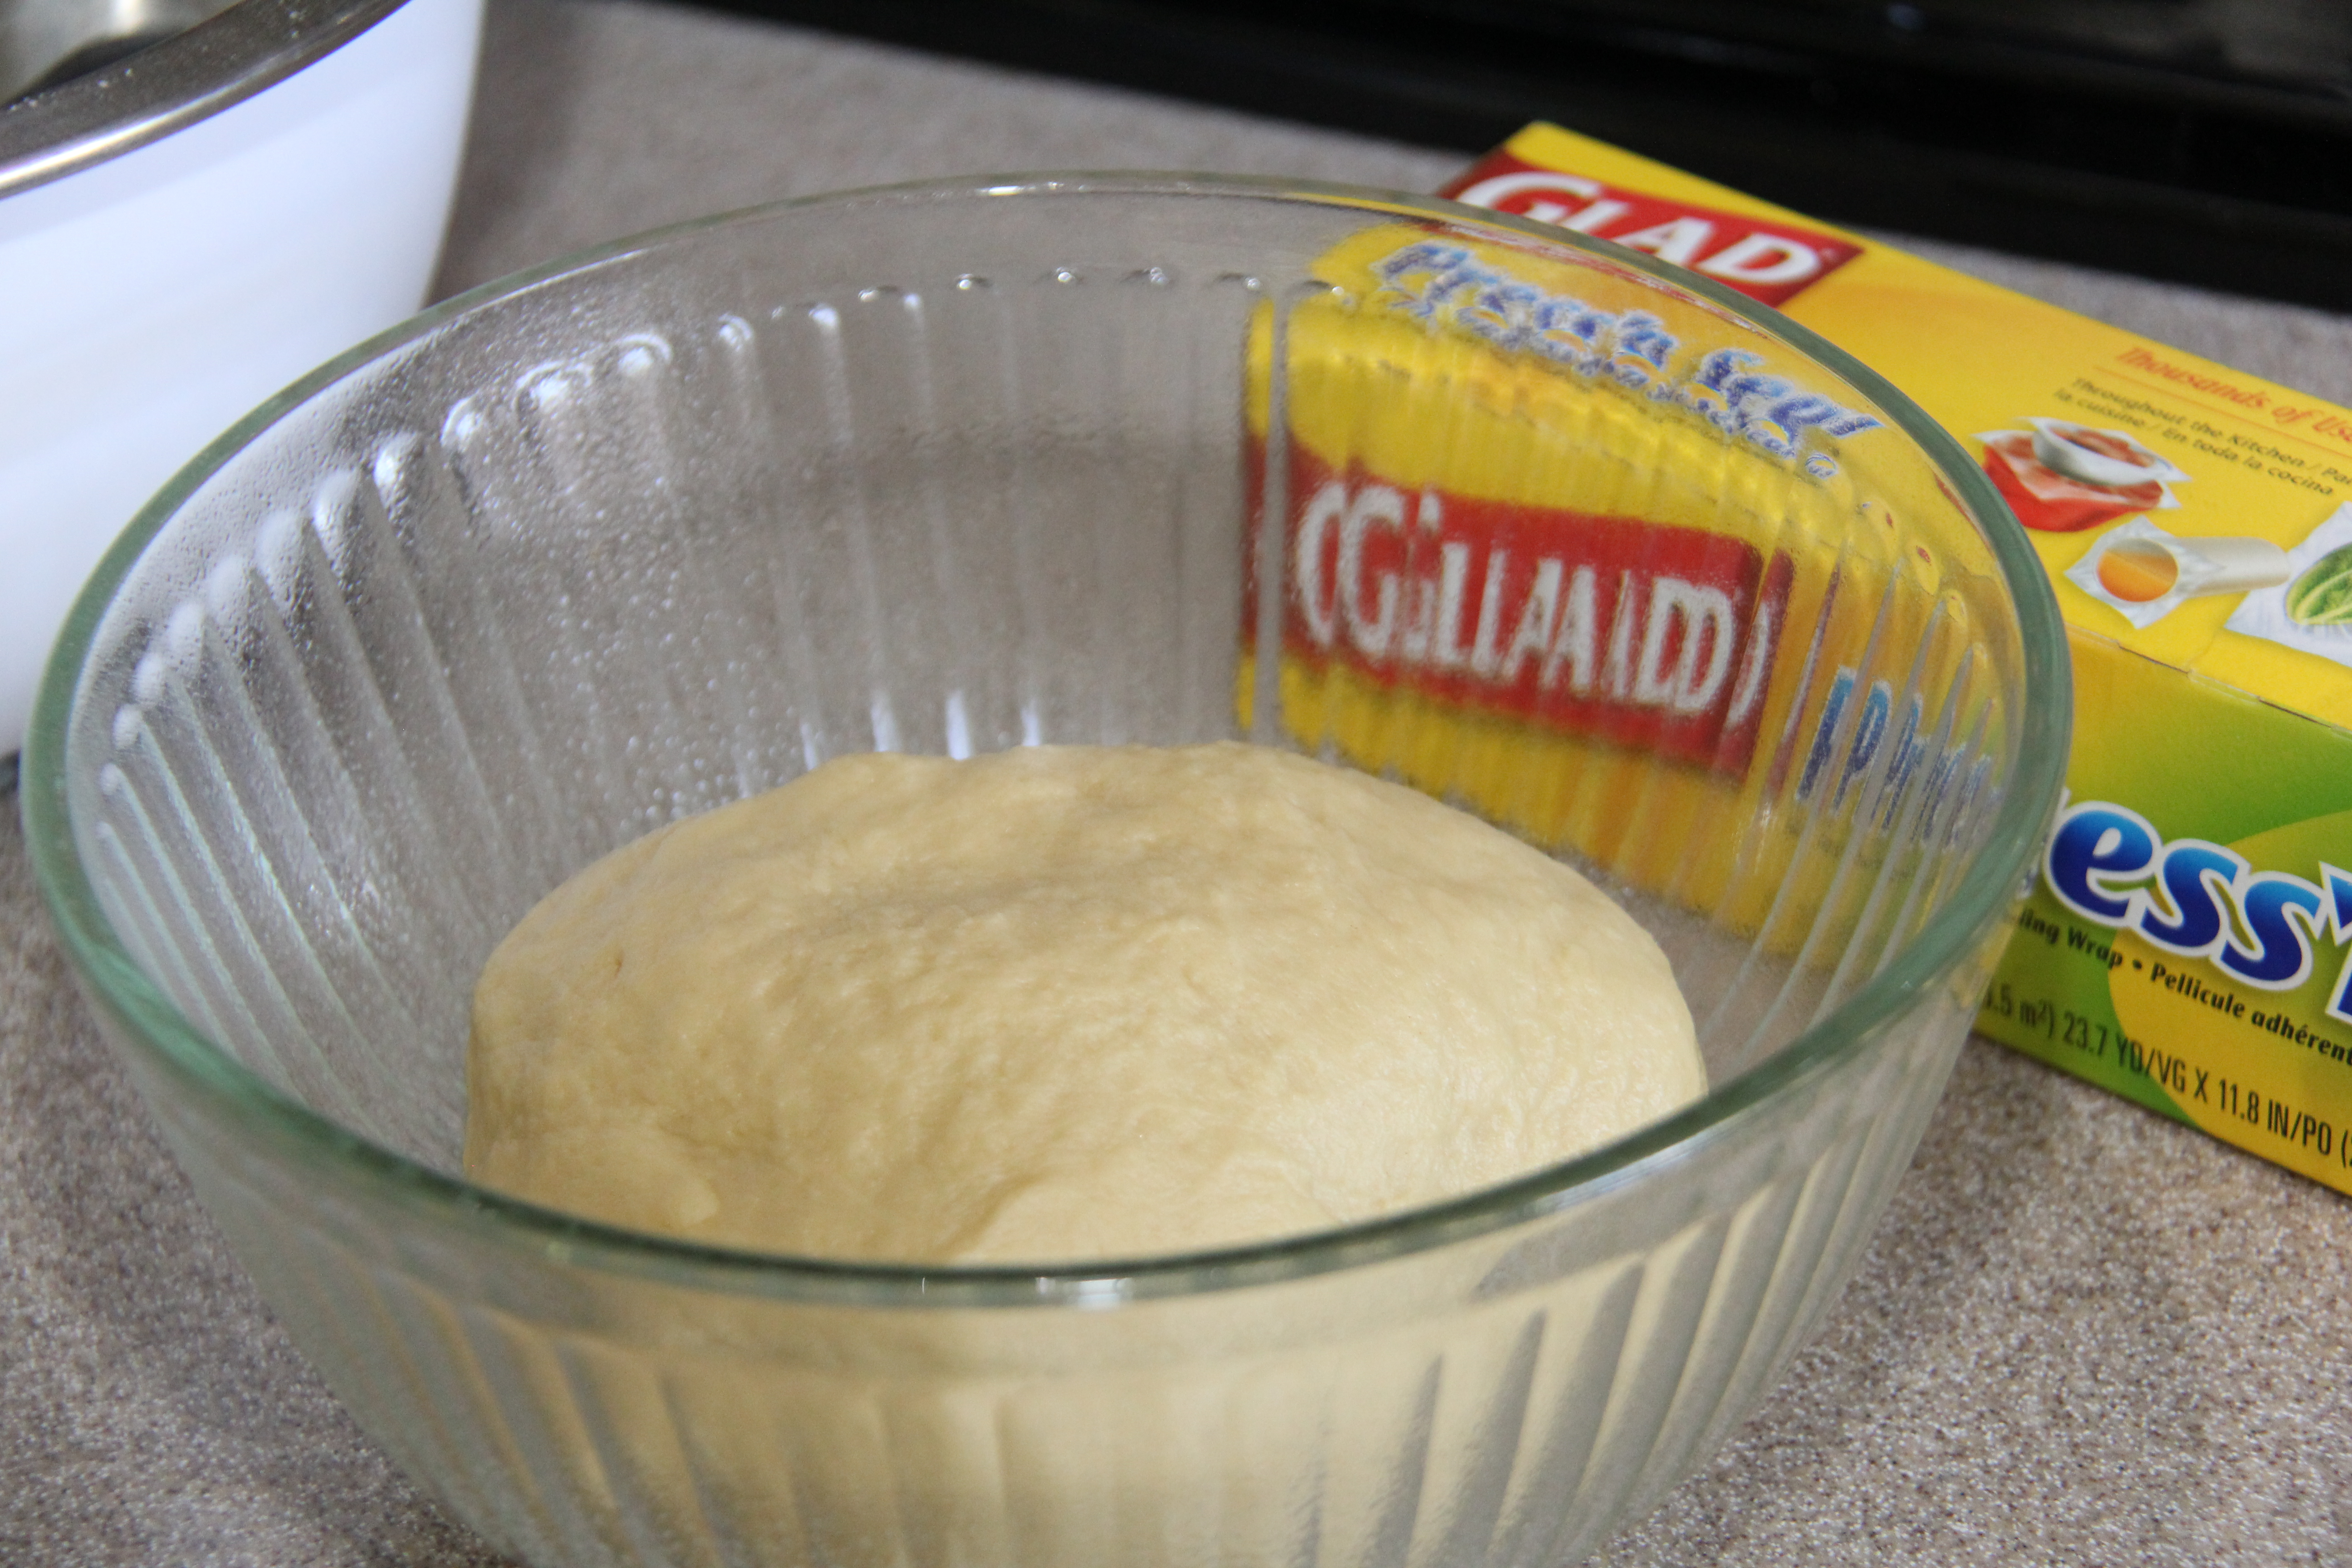
Place dough in a bowl twice the size of the ball to allow for room to rise. Cover tightly with plastic wrap and place in a warm, humid place. Most recipes say to let the dough rise until it is doubled in size, but I’ve discovered that it doesn’t necessarily need to double, but it does need to rest for at least 30 minutes before deflating it and shaping the bread for the final rise.
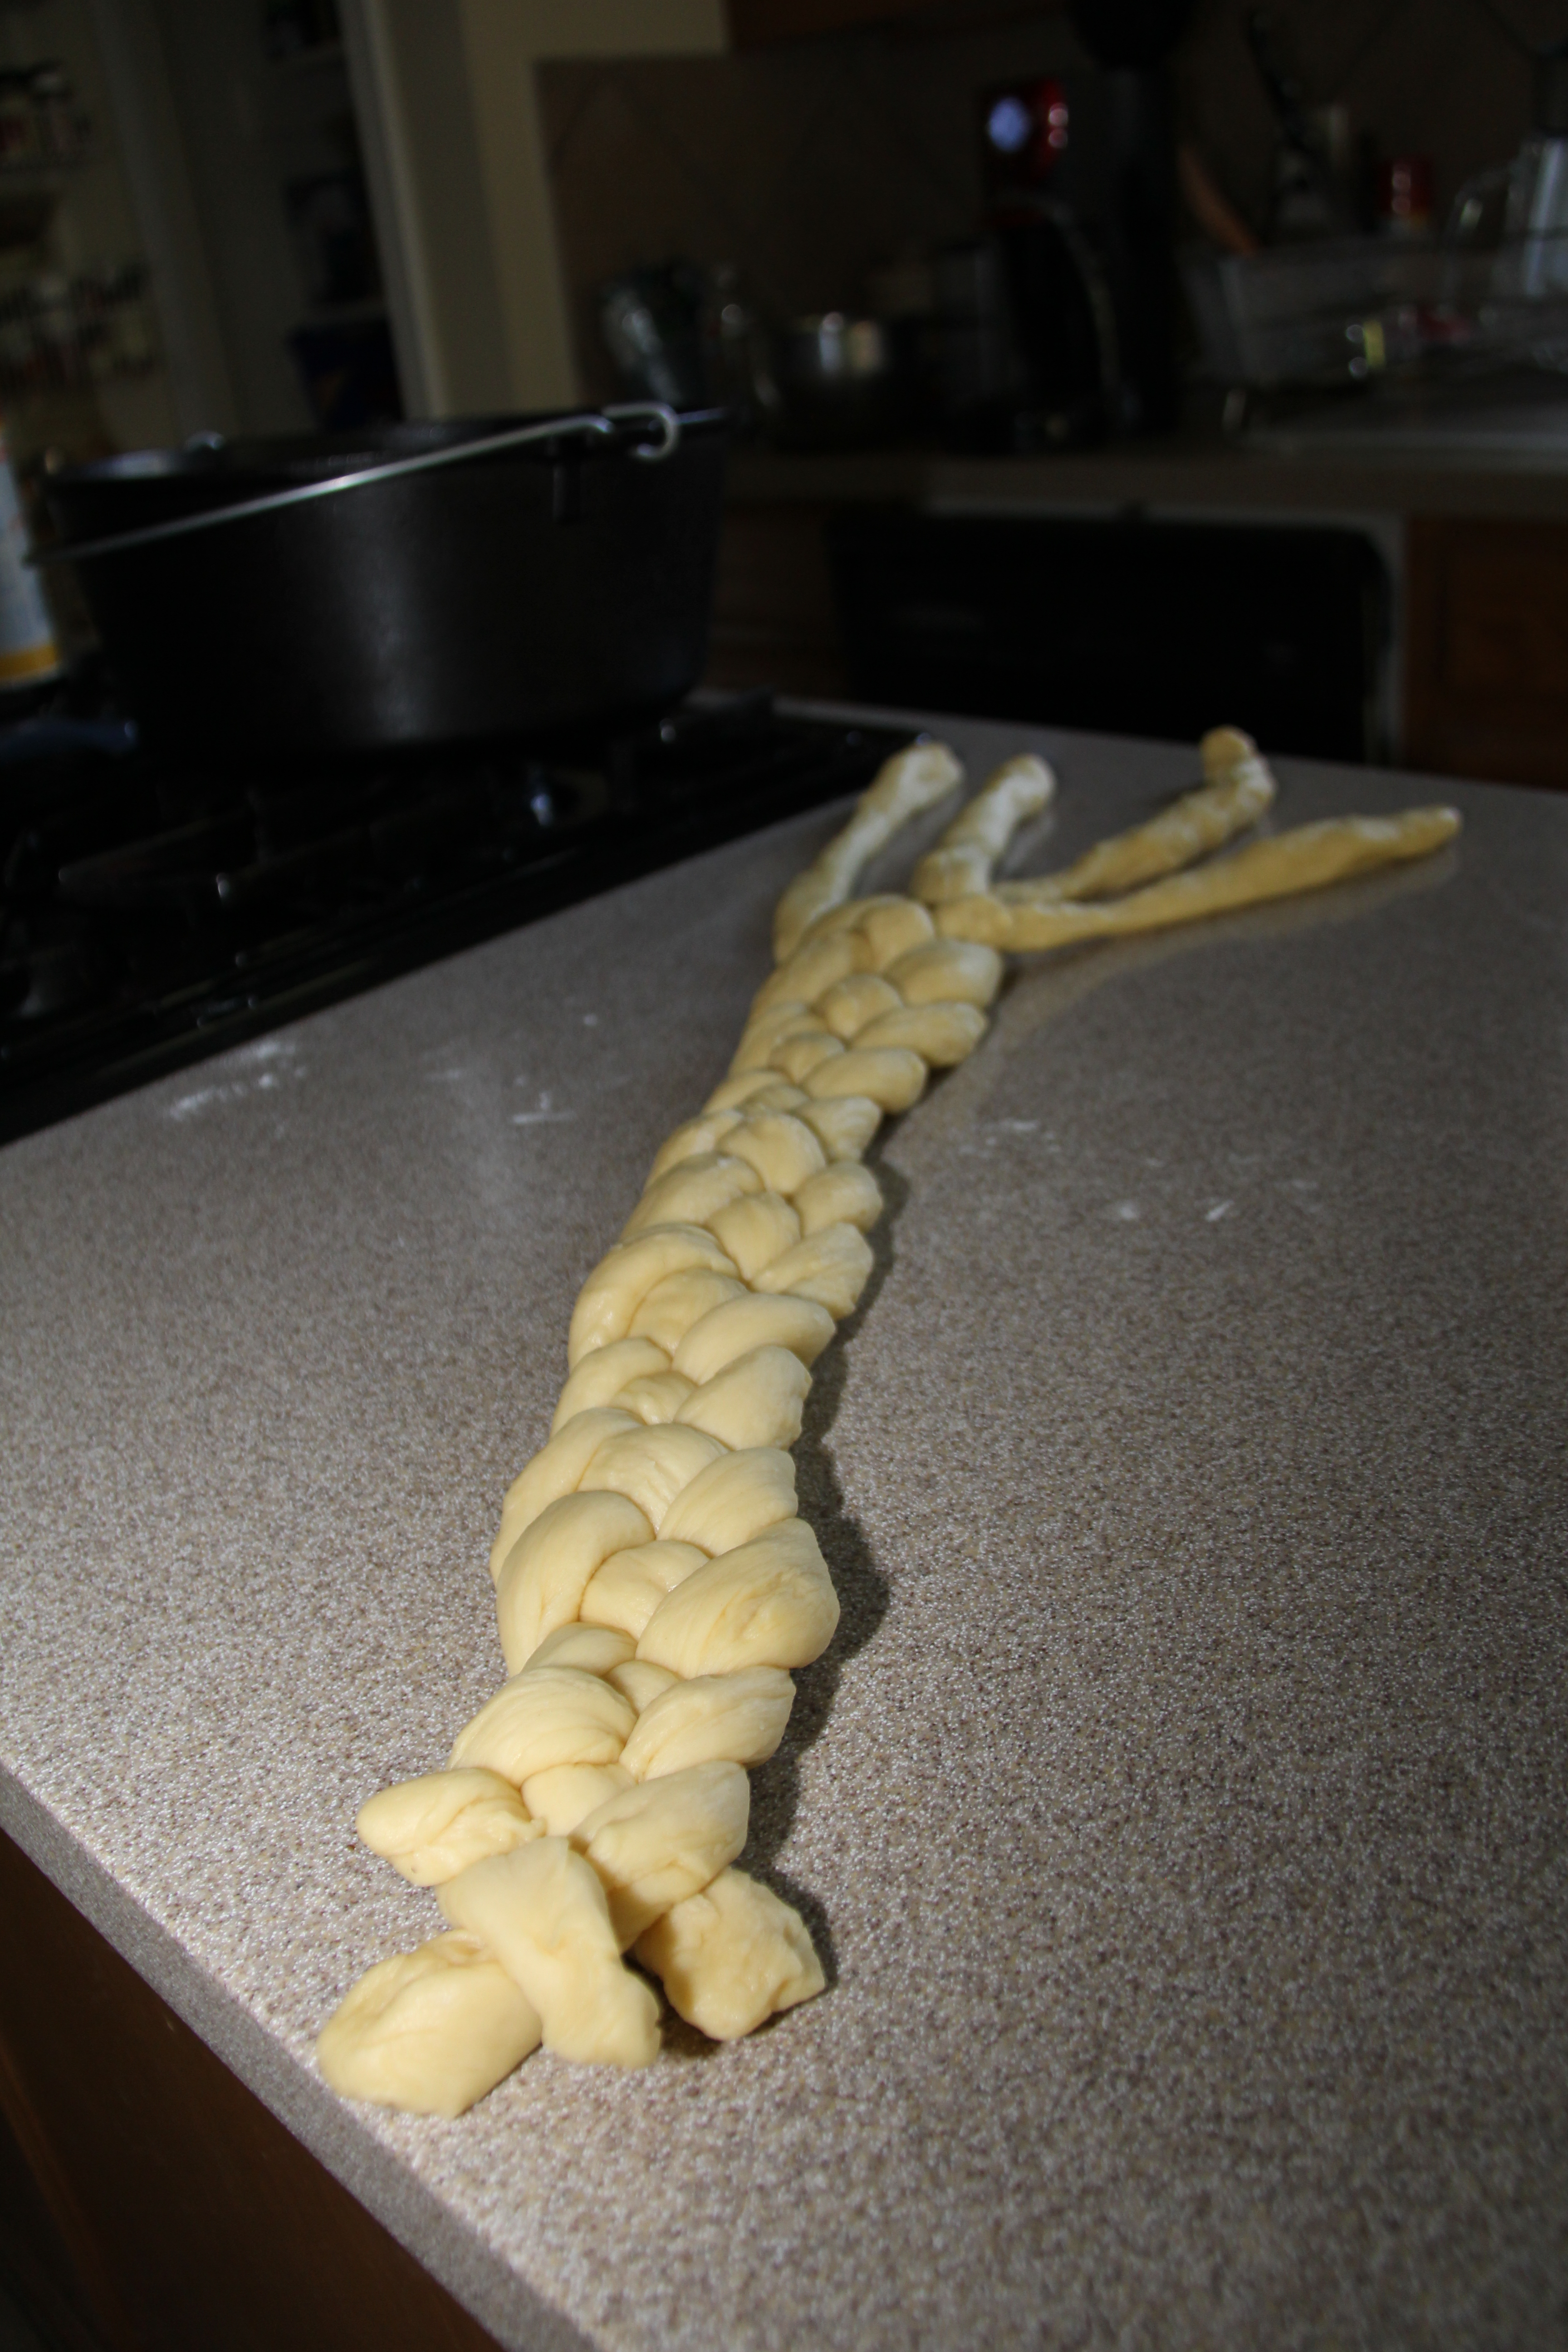
Shaping this recipe into a braid is the main reason why I am doing this experiment. I’m not certian how the bread will fit in a 12″ camp Dutch oven. The challah we made for the 3-Pot in Harper was a double recipe and fit beautifully in our 16″ camp oven. I also didn’t know how the four-braid shape would look when it was done baking. Here’s a great YouTube video that shows the technique for four-braid bread.

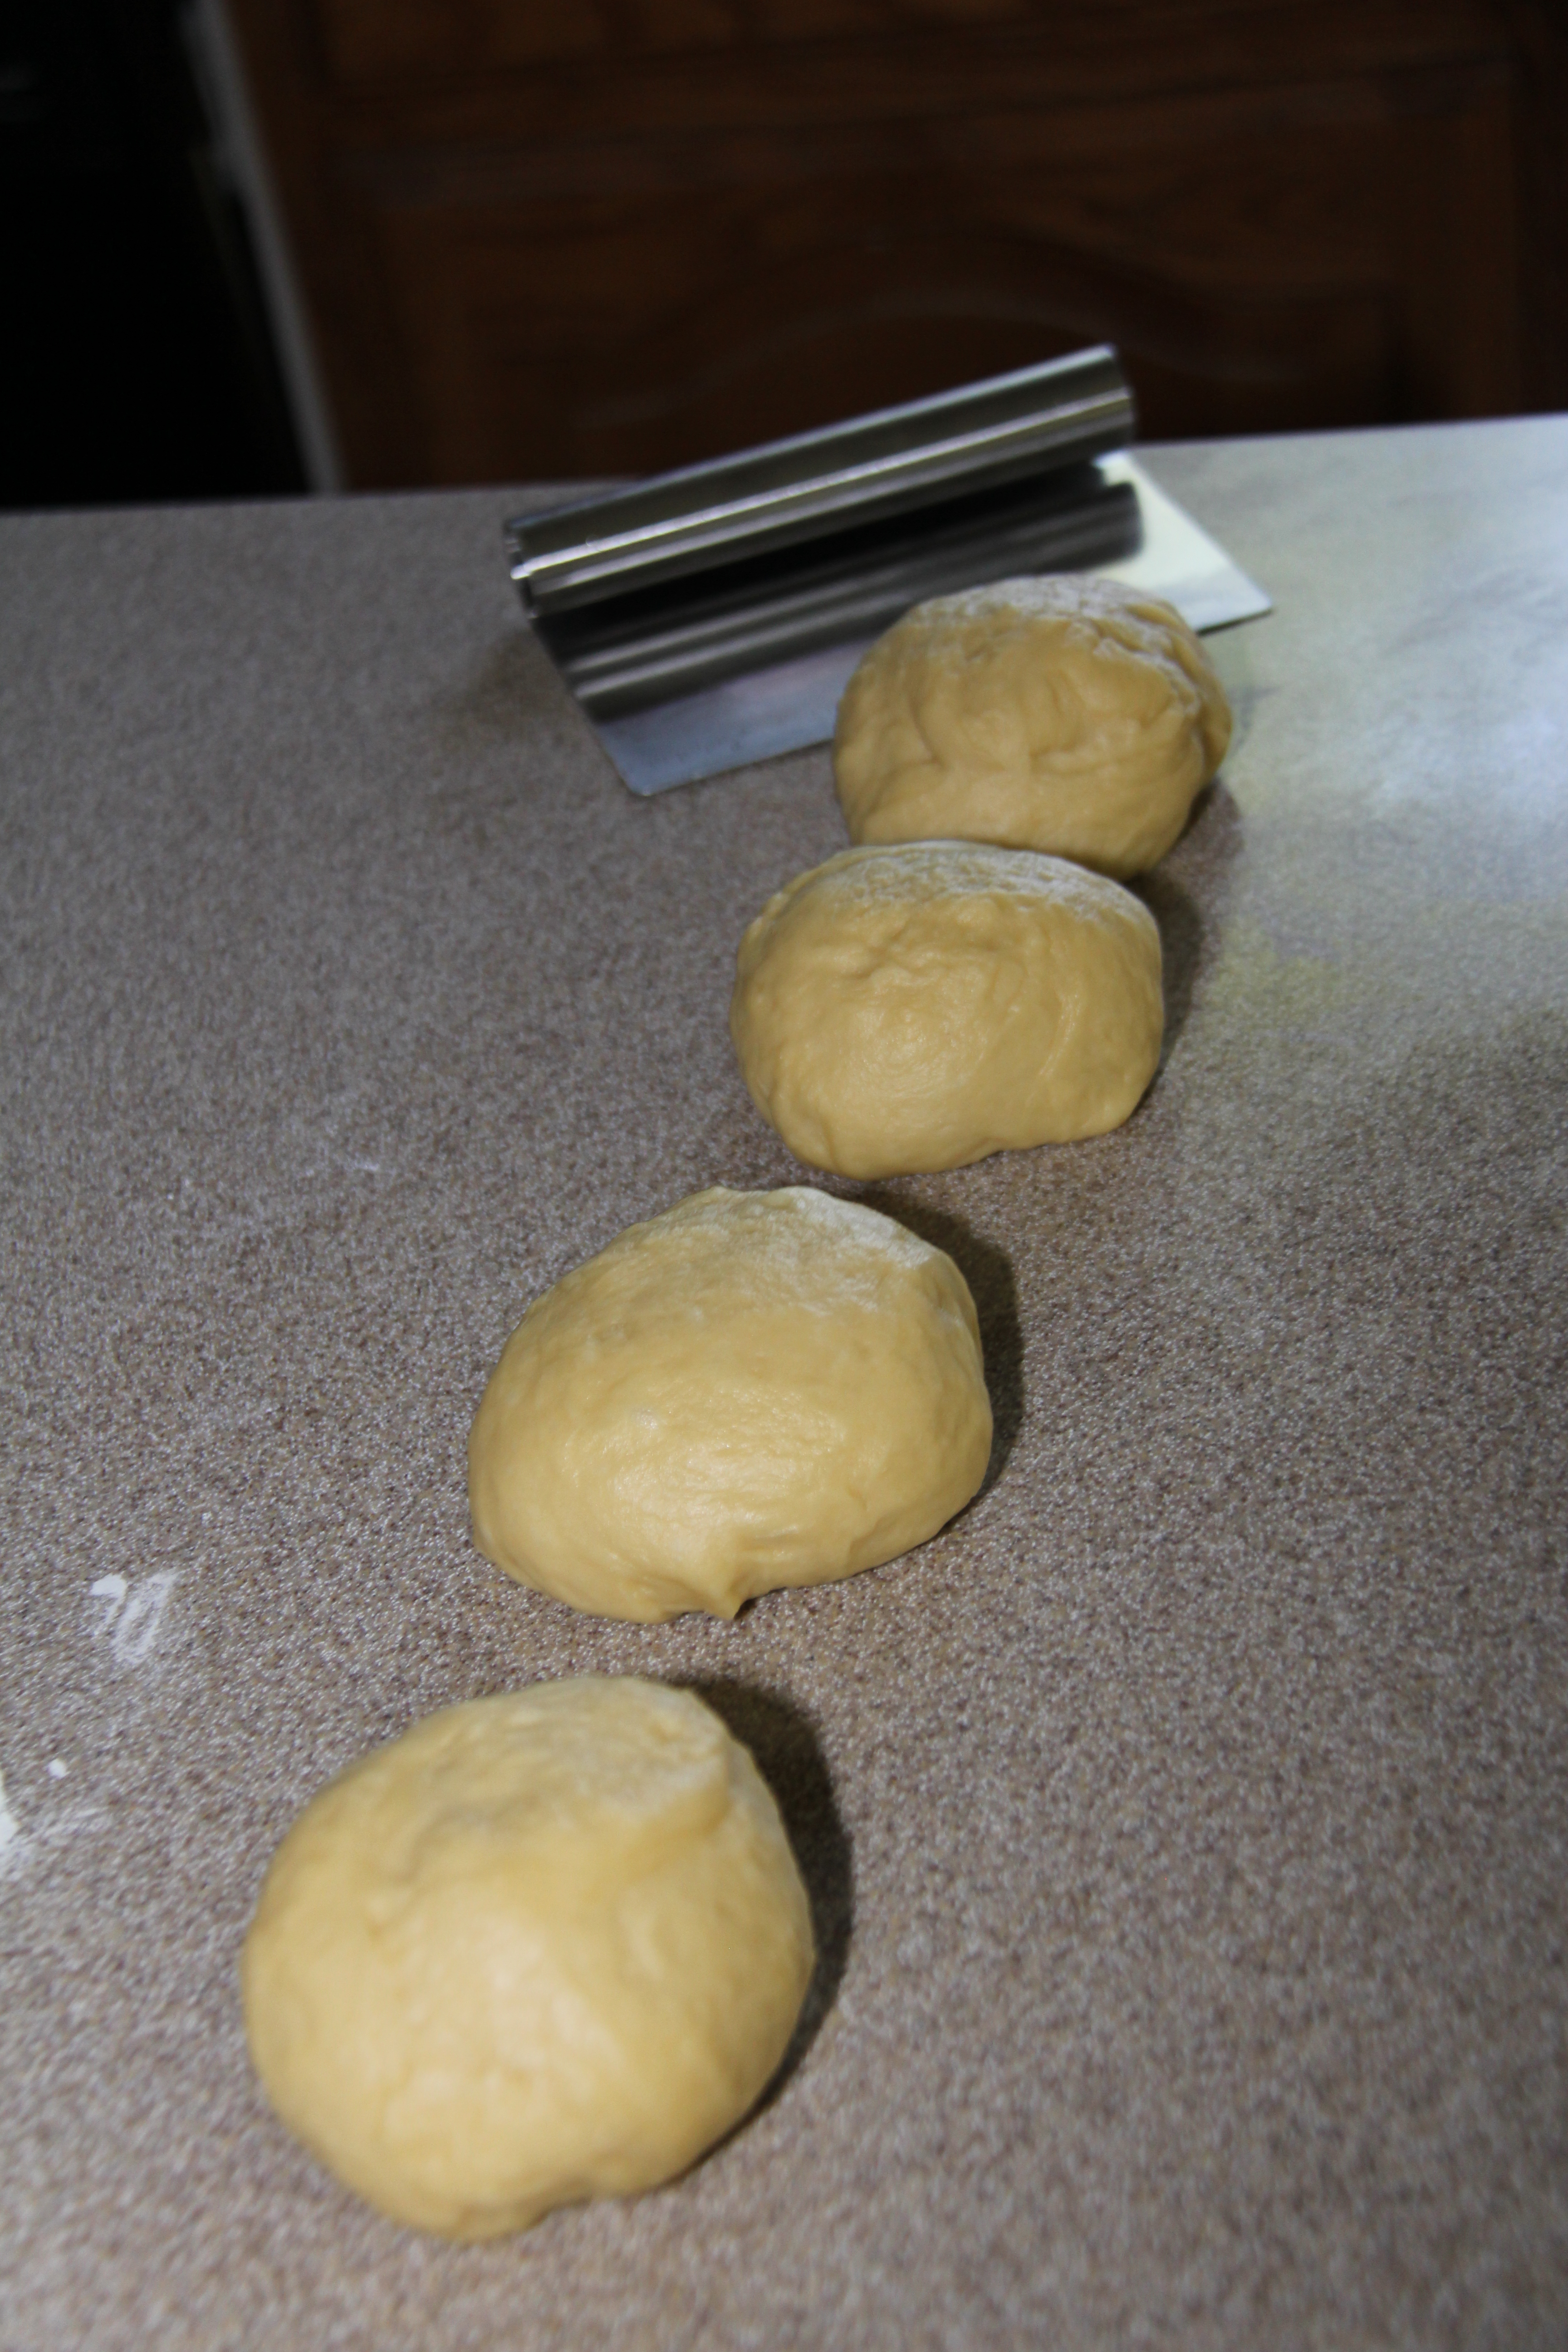
I gently kneaded the dough to remove any big air bubbles and shaped the dough into a smooth round ball. Using a metal bread scrapper, I cut the ball into four even pieces. After shaping them into smaller balls, I noticed that one was bigger than the other, so I pinched of pieces and redistributed the dough until they look even. If you want, you can use a digital scale to weigh each ball and readjust as needed.
 I then rolled each ball out into a 30″ long strand of dough, about a 1/2 inch in diameter and started braiding.
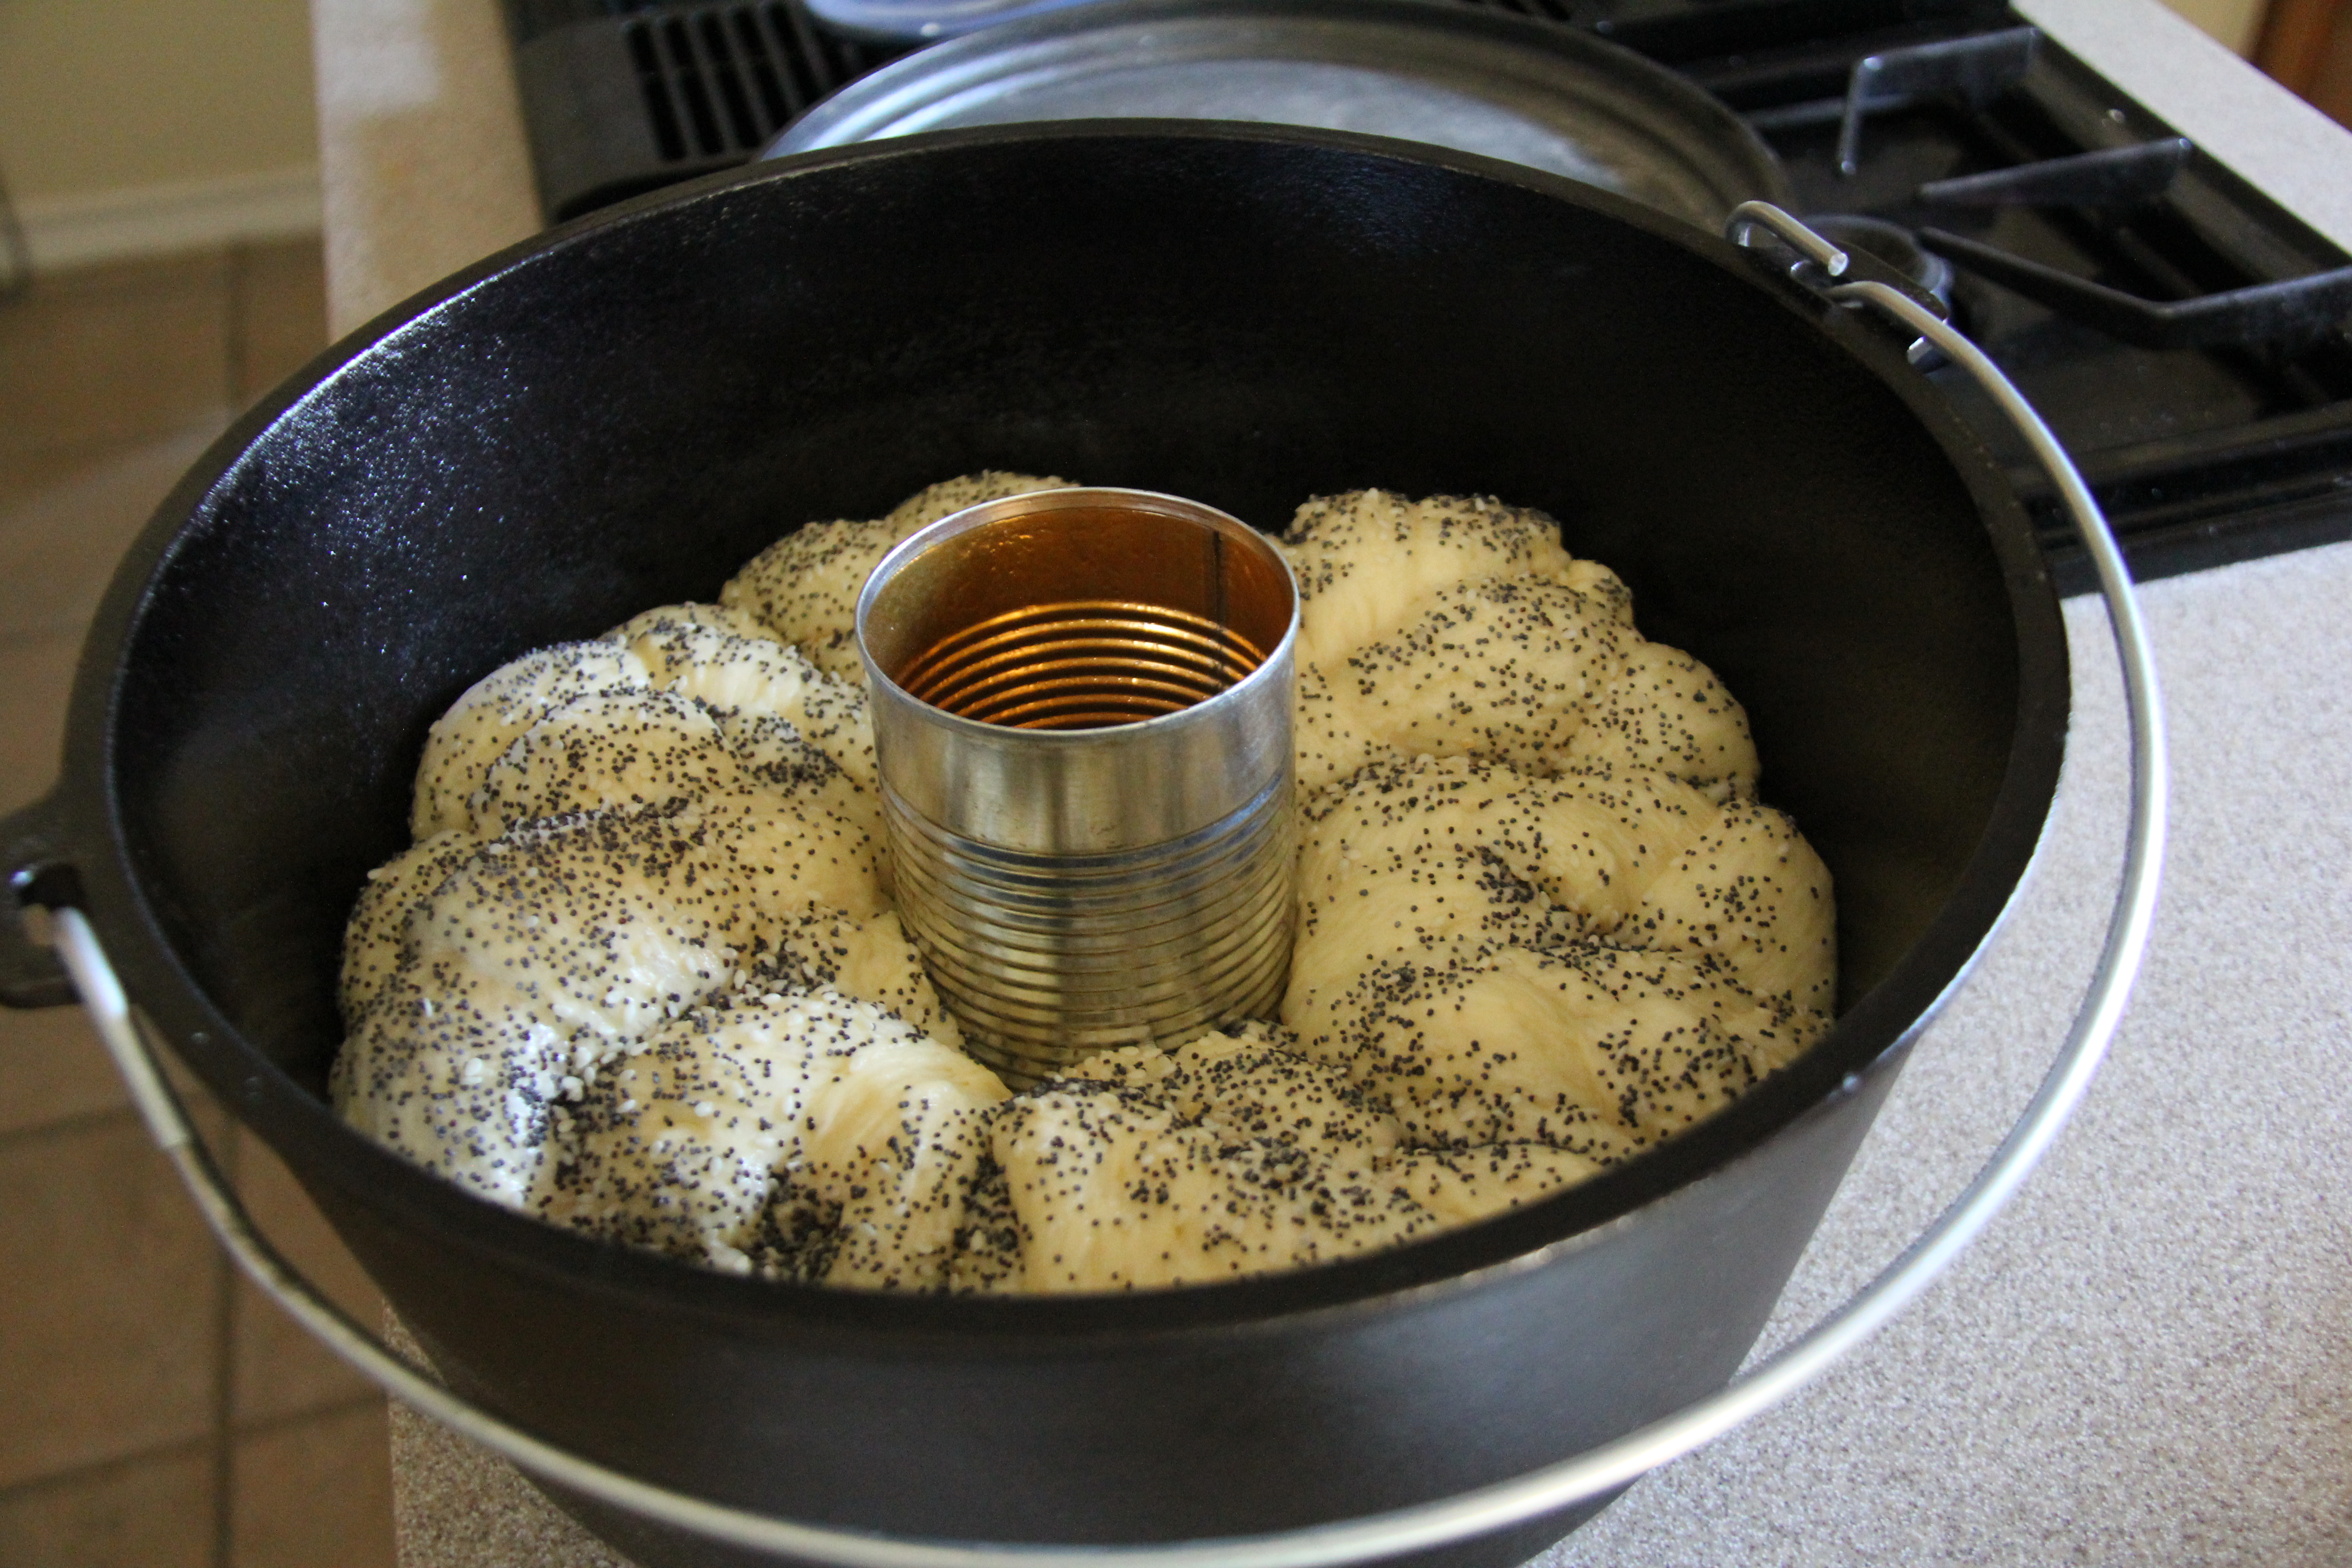
I put the braid into the 12″ Dutch oven and shaped it around the soup can. Then I removed the soup can and liberally applied the egg white wash to the top of the bread and finished by sprinkling poppy seads, seasame seeds, and salt on top.
Now it is ready to for its second rise!
 In less than an hour, it was ready to bake at 325 degrees Fahrenheit. I will share the results in my next post and discuss the lessons learned from this experiment.

Pingback: How to Make Bread | eHow Tos
Pingback: Baking Challah – Wrap Up | Texas Iron Chef
Pingback: Temperature Control – Key to Successful Baking | Texas Iron Chef
Pingback: My First Attempt At Challah | Following Ruth